
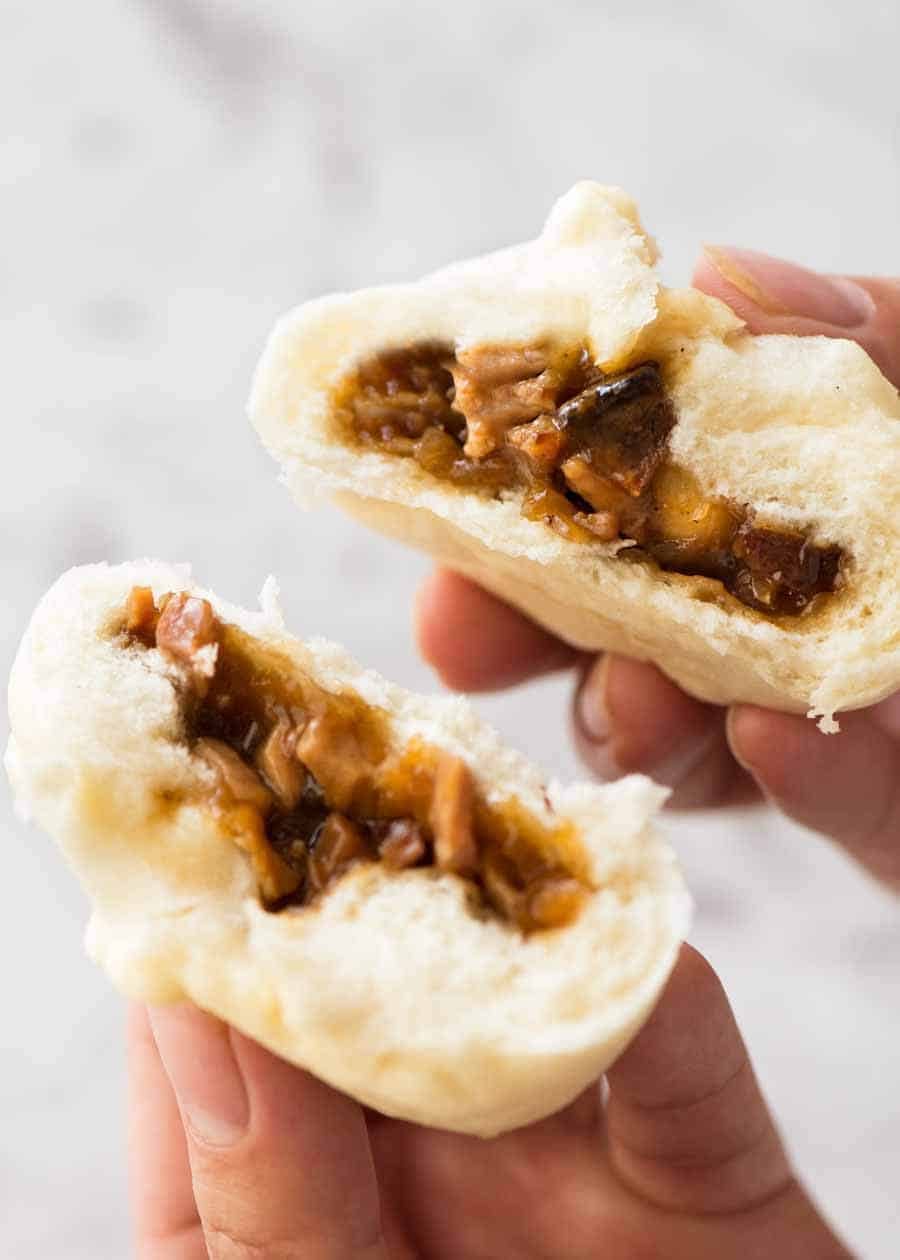
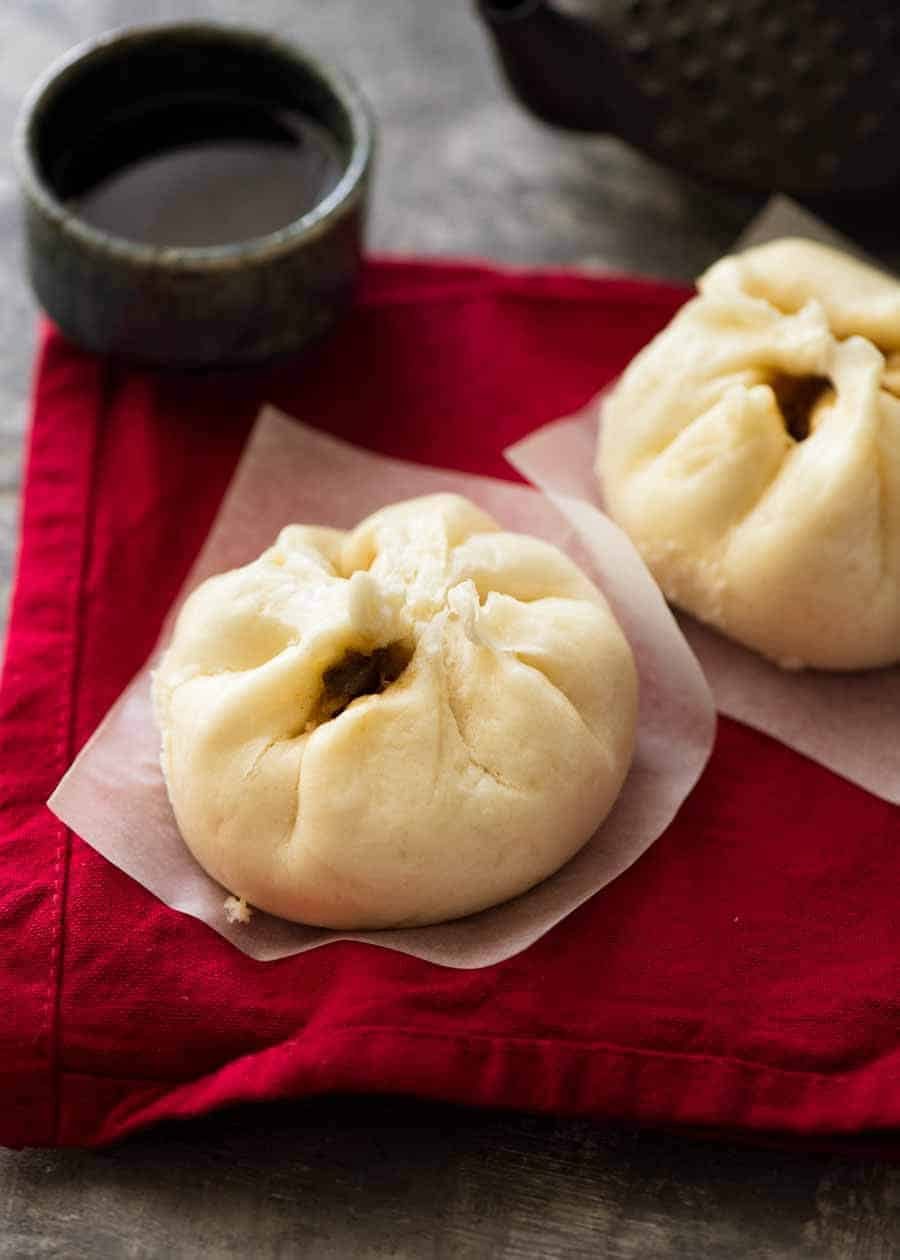
Pillowy soft steamed buns filled with a sweet, savoury saucy pork filling. Homemade Chinese Pork Buns are truly just like the ones you swipe off the dim sum trolleys. These will blow your mind!

Sunday morning Yum Cha is almost a religious ritual here in Sydney. Large groups descend upon vast restaurants from mid morning, with steaming trolleys piled high with dumplings and buns rattling around the room. The familiar sound of bowls being banged onto tables, the bottomless Chinese tea, and the brisk, borderline rude service.
It’s all part of the experience. Polite service at Yum Cha is almost creepy. It’s just wrong. 😂
The trolley-chasing protocol differs from restaurant to restaurant, but I’m shameless. Where there’s a will, there’s a way. And when I need pork buns, I will stalk trolley after trolley until I find it!
CHINESE STEAMED PORK BUNS
Homemade Pork Buns aren’t a quick and easy recipe but they are worth the effort because it will blow your mind how similar they are to Yum Cha / Dim Sum. Plus, if you’re addicted as I am to pork buns, you’ll save stacks because it’s probably 70 – 80% cheaper to make at home.
And they are the ultimate freezer standby. 1 minute in the microwave from frozen = pork buns that you’d swear just came out of a bamboo steamer.
HOW TO MAKE PORK BUNS
There are 4 main steps to making steamed pork buns.
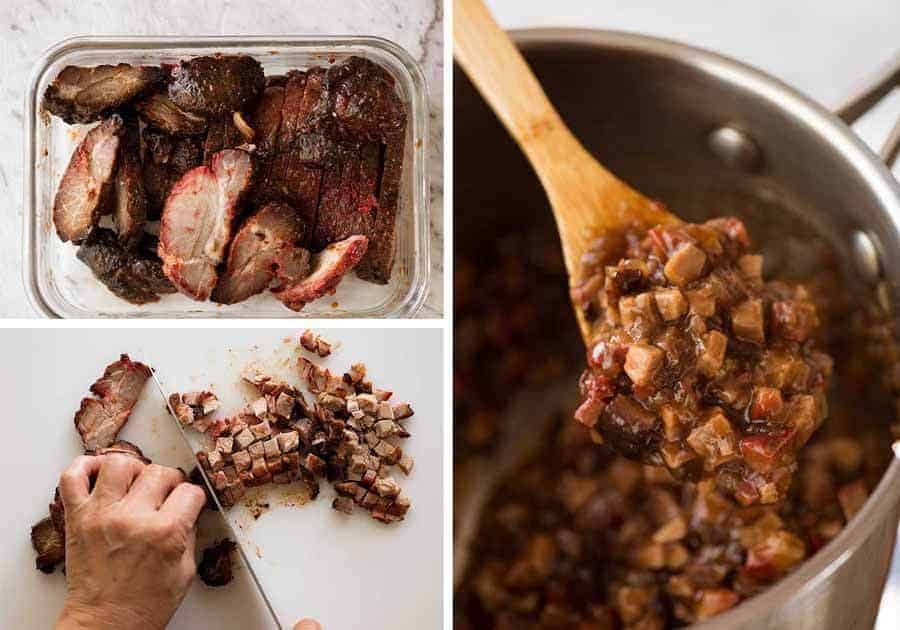
1. THE FILLING
Made with Chinese Barbecue Pork (Char Siu), chopped then coated in a simple sweet and savoury sauce. Use either store bought or homemade Char Siu. Full blown home made Char Siu requires at least 24 hours marinating time, so if time is of the essence, refer to the recipe notes for a quick homemade Char Siu.
2. DOUGH FOR PORK BUNS
Just like making any yeast bread or rolls, the dough is pretty standard and effortless if made using a stand mixer!
The dough is soft and elastic dough, very easy to work with. The recipe video is helpful to see the dough consistency.
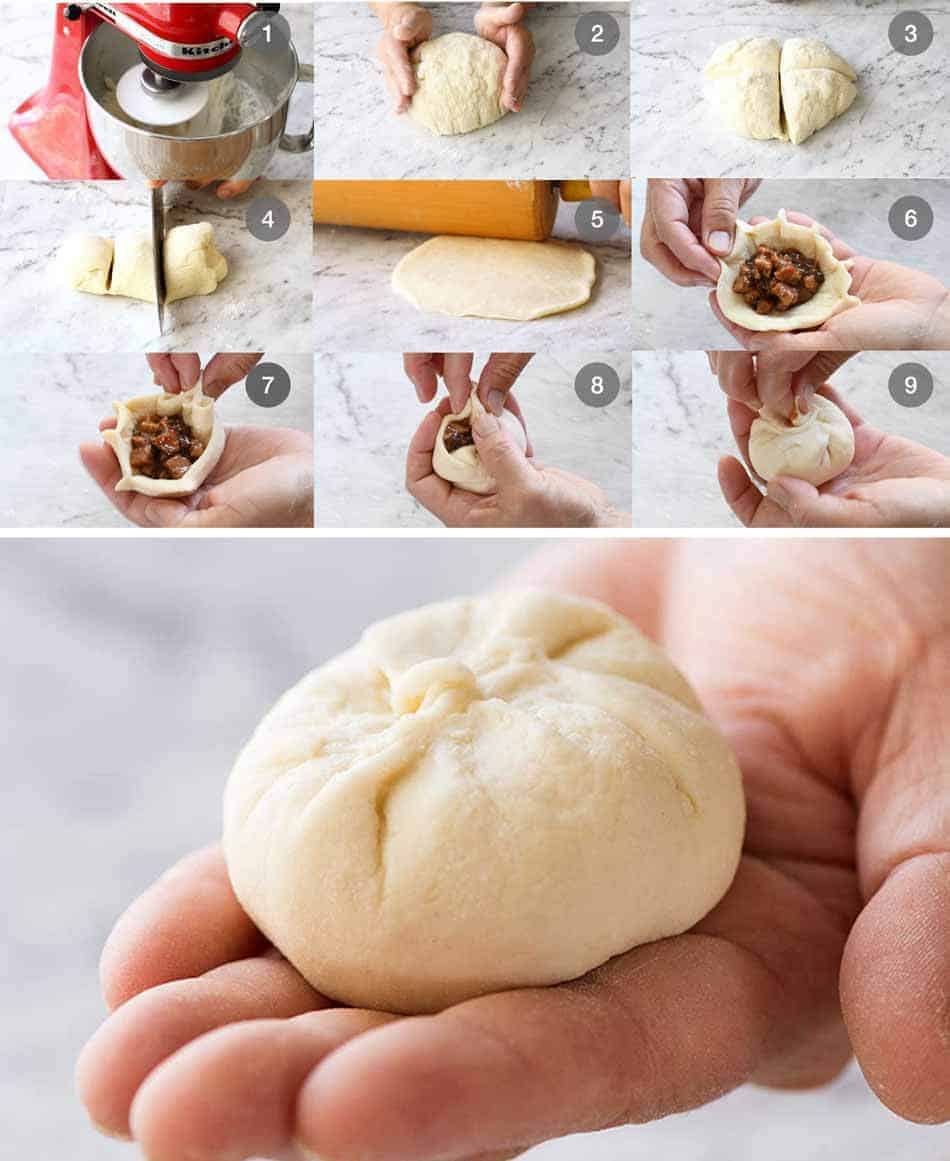
3. STUFF ‘EM!
OK, so there’s no denying this is the part that takes some practice and I’m no Pork Bun Goddess. But it doesn’t matter. Even if you just bundle it up like a money bag and get that filling sealed inside, it’s still going to taste just as good!
The recipe video is the best way to learn how to wrap pork buns, but here’s a brief step by step description:
Roll out pretty thin rounds, making the edges thinner so you don’t end up with a huge thick wad of dough when you pinch it together;
Place it on your hand and top with Filling. Pinch the dough around the edges (#6 below) to make pleats – around 8 times;
Moving around the edge, gather together the pleats, bringing them together so you end up sealing the bun at the top (#7 and #8 below);
Pinch to seal and give it a good twist (#9).
Voila! You’re a Pork Bun Master!
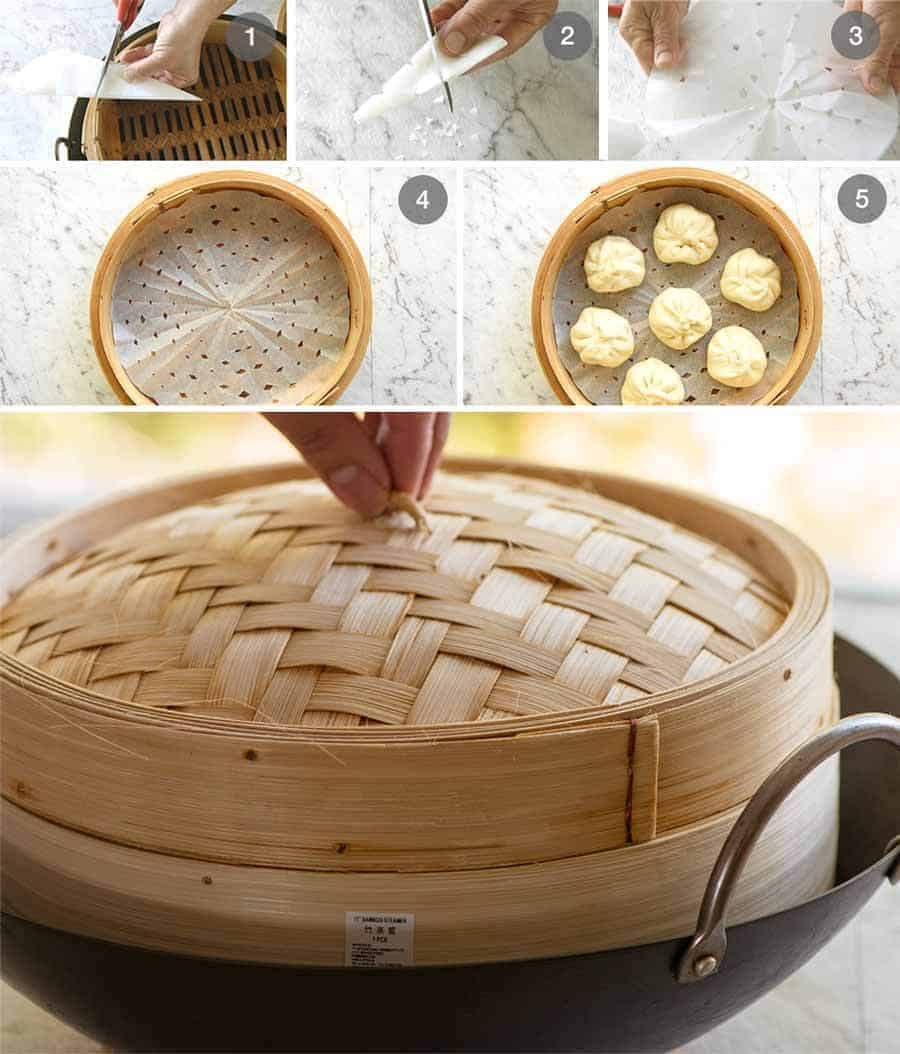
4. Steam!
I use a bamboo steamer set over simmering water in a wok. Any steamer will do, but if you want the truly authentic pork bun experience, it’s worth getting a bamboo steamer because it imparts a subtle fragrance into the buns.
They aren’t expensive and you can find them at most Asian stores. Then you can make Chinese Steamed Fish, Shumai – Japanese Steamed Dumplings and Steamed Chinese Dumplings!
Nifty tip: How to make the paper liner for the bamboo steamer. Fold baking paper, line up with centre and trim off end (#1), then cut little diamonds along the edge (#2), unfold (#3) then plonk into your steamer!
ALL CREDIT TO WOKS OF LIFE
I want to be very clear about giving credit for this recipe because it is not an original recipe by me.
This is a recipe that was meticulously researched and created by Judy and Bill from Woks of Life – their Steamed BBQ Pork Buns. Really good people, excellent taste, exceptional cooks and a very high standard of quality. I trust their recipes completely.
Judy and Bill – we salute you!
It’s worth every minute of effort. Tastiness aside, everyone is always soooooo impressed by homemade Pork Buns.
Let’s be honest. The prospective praise seals the deal.😂 – Nagi x
MORE GREAT DUMPLINGS OF THE WORLD
- Potstickers (Chinese pan fried dumplings)
- Gyoza (Japanese dumplings)
- Shumai (Japanese steamed dumplings on my mother’s site, RecipeTin Japan!)
- Wontons
- Browse the Yum Cha recipe collection
WATCH HOW TO MAKE IT
Hungry for more? Subscribe to my newsletter and follow along on Facebook, Pinterest and Instagram for all of the latest updates.
Chinese Steamed Pork Buns
Ingredients
Yeast Activation:
- 1 tsp active dry yeast powder
- 1/4 cup / 65 ml warm water
- 1 tbsp white sugar
Dough:
- 1/2 cup /125 ml warm water
- 4 tbsp /70g white sugar
- 2 cups / 300g plain flour (all purpose)
- 1 cup / 155g cornflour / cornstarch
- 1/4 cup / 65 ml vegetable oil
- 2 1/2 tsp baking powder
Pork Filling:
- 1 tbsp vegetable oil
- 1/3 cup finely chopped escalot or white onion (Note 1)
- 1 tbsp sugar
- 1 1/2 tbsp soy sauce , regular or light (not dark)
- 1 1/2 tbsp oyster sauce (can sub Hoisin)
- 1 tbsp sesame oil
- 1/2 cup water
- 1 tbsp cornflour dissolved in 1 tbsp water
- 1 1/2 cups Chinese Barbecue Pork , diced (Note 2)
Instructions
Dough:
- Yeast Activation: Place yeast, sugar and water in a small bowl. Mix, then set aside for 10 minutes until it becomes foamy.
- Place flour, cornflour and sugar in a stand mixer bowl fitted with a dough hook. Mix briefly to combine.
- Add yeast mixture, oil and water. Mix on low speed for 3 minutes until a smooth ball of dough forms. It should be soft and elastic, not so sticky it gets stuck all over your hands. Adjust with a touch of flour/water if required to get the dough consistency right.
- Cover with cling wrap and place in a warm dry place for 2 hours until it doubles in volume. (Note 3). Meanwhile, make Filling.
- Remove cling wrap, scatter over baking powder. Return to stand mixer and mix on low for 2 minutes.
- Turn dough out onto work surface, sprinkle with flour. Knead lightly to form a smooth round disc.
Making Buns (watch video):
- Cut dough into 4 pieces. Take one piece, roll into an even log, cut into 3 pieces (so 12 pieces in total).
- Take one piece of dough, cover remaining with cling wrap or tea towel.
- Roll into round 4.5″ / 11 cm in diameter, making the edges thinner.
- Place dough in hand, put 1 1/2 tbsp of Filling in the centre.
- Pinch 8 pleats around the edges. Then gather the pleats together one by one to seal the bun. Pinch the top the twist.
- Repeat with remaining dough – make 12 in total.
- Cover buns loosely with cling wrap and leave in a warm place for 15 minutes.
Steaming:
- Line a large bamboo steamer (or other steamer) with parchment paper punctured with holes (Note 4).
- Place 6 to 8 buns on paper, cover with steamer lid.
- Pour about 4 cm / 1 1/2 inches in a wok / pot (steamer should not touch water) and bring to rapid simmer over medium high.
- Place steamer in wok, then cook for 12 minutes. Check water halfway through, top up if required.
- Buns are ready when they spring back when touched, and the buns have formed a smooth skin.
- Remove steamer from wok, serve warm!
Filling:
- Heat oil in a saucepan over medium heat. Add eschalots and cook for 2 minutes.
- Add sugar, soy sauce, oyster sauce, sesame oil and water. Mix.
- While stirring, slowly pour cornflour mixture in. Mix until smooth.
- Stir in pork. Cook until sauce is thickened, 1 – 1 1/2 minutes (see video for consistency). Set aside to cool (thickens when cools).
Recipe Notes:
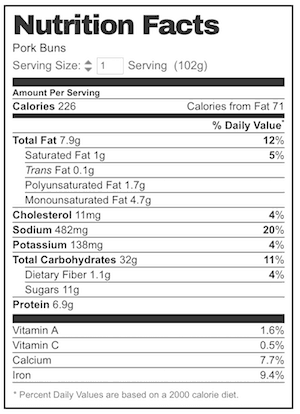
Nutrition Information:
LIFE OF DOZER
MOVE! I can’t change the channel!

Love this recipe! I’ve used the homemade Char Siu recipe along with this Pork buns recipe and my husband LOVES it!!
I’ve moved from Australia to the US and could not find these guys, but I wanted my husband to experience them.
Thank you so much for sharing!
Awesome recipe, taste and texture was exactly like the authentic ones you can buy.
I was worried because my dough was much more dense than in the video but it still worked!
Followed the receipe and they ate amazing! Put some in the freezer so they dont all get eaten in one day! Alot of love amd patience made them delicious
Hey there! Love your page, but have a suggestion which hopefully you might find useful when writing recipes. 1 tablespoon in US isn’t the same as 1 tablespoon in Australia, if maybe you could add weight in grams instead for more accuracy? Thank you!
These are awesome! Perfect as written. We are getting creative with the fillings different meats, veggies,pickles and even jams. What a fun recipe!
Hi Nagi,
I am going to make this soon, cannot wait! My family and I have been on the hunt for a specific Chinese steamed pork bun that was sold in South Africa by a Chinese family that left quite a few years back.
We are hoping your recipe will get us close to their taste.
Just wanted to ask, is this the common method and recipe of steamed pork buns, I remember the owners of the store called them Boa, is there a difference in flavor or is it the same thing as your recipe?
Thanks so much:)
Hi I love this recipe, I really enjoy cooking a lot of your recipes. Thankyou!
Hello! Do you use a cup of just cornstarch or half cornstarch and half corn flour?
Hi Celine, cornstarch and corn flour are the same thing – you need 1 cup here 🙂 N x
Hi there, when making pizza dough I do it the old fashioned way by kneading manually. Will that technique work ok for this recipe? Thanks!
Sure can Rick – enjoy! N x
Hi Nagi. I hope you are well. I noticed the recipe called for 1 cup of cornstarch. Can I use cake flour instead? BTW, there is now a shortage on yeast. Thanks
Hi Julie, no you can’t sorry – you really need the cornstarch here unfortunately. N x
It was so fun making this! I can’t wait to make this again. It was so simple too! Thank you! I love cooking with your recipes.
Thanks so much Anna! N x
Can I use self rising flour? 🙂
Not for these ones unfortunately as yeast is the raising agent in here – N x
Hi Nagi love your recipes always looking you up when I’m after a good dinner idea
I currently have my dough rising in the dryer btw great tip, I’ve just tried the filling mixture which I doubled as I’m making a double batch however it’s really salty. I’ve added water twice to reduce down which has taken some salt away but it’s still quite salty. Any home remedying for too much salt please
Hi Jennifer – sorry you’re finding it salty, did you follow the recipe? N x
Will plain flour work? As previously I’ve made Chinese buns using plain flour the texture is not soft but tough or solid not fluffy?
Hi El, yes this recipe works – you can see in the photos and video. This recipe uses a mix of plain and cornflour. N x
Sounds good. Look forward to make this then.
I don’t normally post on any sites but these worked out wonderfully Nagi. To be honest you are now my go to website. When menu planning, most recipes come from you and I haven’t had a bad one yet. Thank you! Stay safe and well in this new crazy world
Hi, if I use instant yeast do I still have to put it in the water and sugar mixture?
Hi Nagi! How long can we let the dough sit? We recommended 2 hours, but could I let it sit overnight?
Hi Samantha, unfortunately you can’t as it will rise too much – N x
I have no yeast Can you use without yeast?
You need the yeast for these buns to rise unfortunately – N x
These buns turned out perfectly the first time! The only thing is I left it to rise for 2.5 hours so my buns tasted quite sour/ alcohol-ish because it overfermented. Still very delicious and my family loved it. Thank you! I love all your recipes 🙂
Hi Li-Shan – I’ve never had that happen before! I’m so glad your family still enjoyed them though 🙂
Just finish making them and they are absolutely delish…thx again Nagi😍
WOOT! That’s great to hear Dessy! N x
I made these these weekend – they were delicious! But I found that when I steamed them the outside of the bun turned brown – any ideas why?
Hi Dawna, I’ve never had this issue to be honest! N x
I had a couple of the buns open up when they steamed – I wondered if some of the sauce from the filling may have gotten into the water. Regardless they are delicious and my kids (9 and 7) loves them!
Hi Nagi! Can I use instant dry yeast for the dough?
Hi Karen, yes you can – that’s what I use 🙂
Can I use baking soda instead of baking powder?