
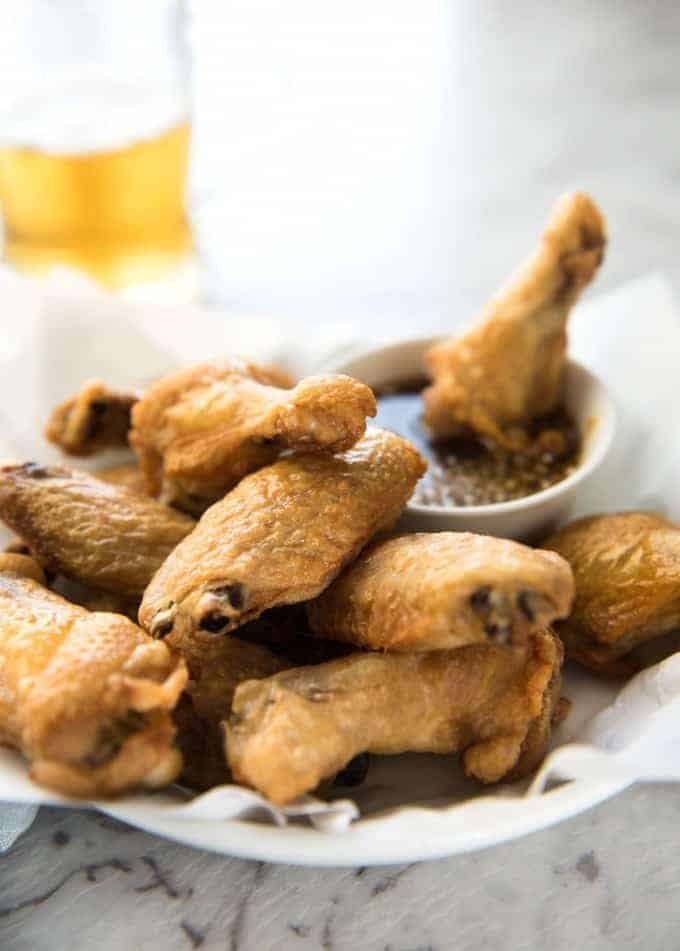
No false promises here – these crispy oven baked wings are SERIOUSLY crispy! You will be gob smacked how easy they are to make. They honestly taste like they’ve been deep fried, with a thin shatteringly crisp golden skin. You can see how easy these are to make and hear how crispy they really are in this cooking video.
These are so good they can be eaten plain. Or toss them in your favourite sauce, or serve it on the side. I’ve provided a selection of sauces for these crispy baked wings in the recipe below!
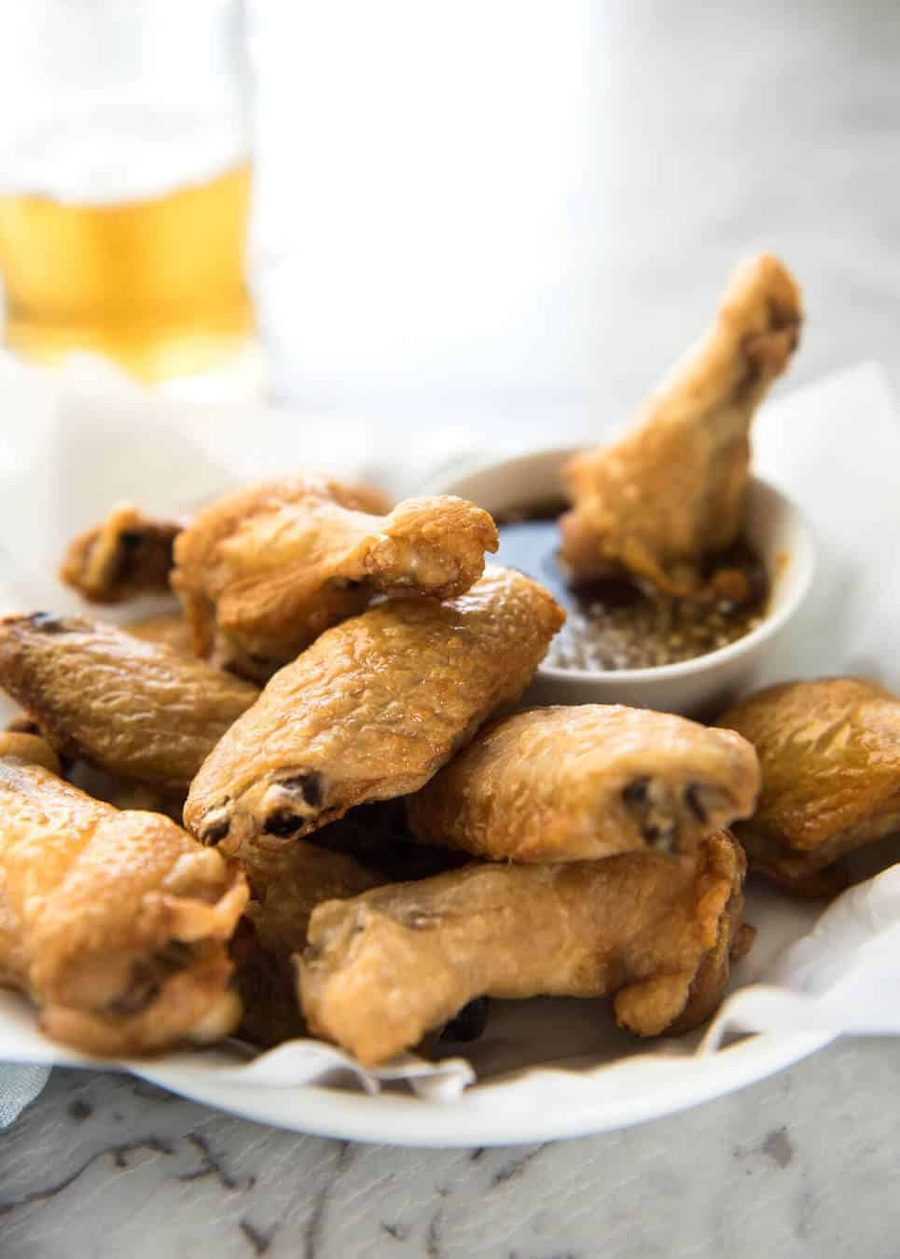
Truly crispy oven baked wings
This recipe for how to make Crispy Oven Baked Wings is a discovery by the genius folk over at Cook’s Illustrated. Being the food nerd I am, I really enjoy how Cook’s Illustrated explains the science behind why they do things in a particular way.
And I honestly believe this to be one of their most all time most epic recipes, especially because it’s so insanely EASY!!! And today, I’m sharing the secret with you. Are you ready? 🙂
How to make crispy oven baked wings
Crispy oven baked wings in 3 easy steps:
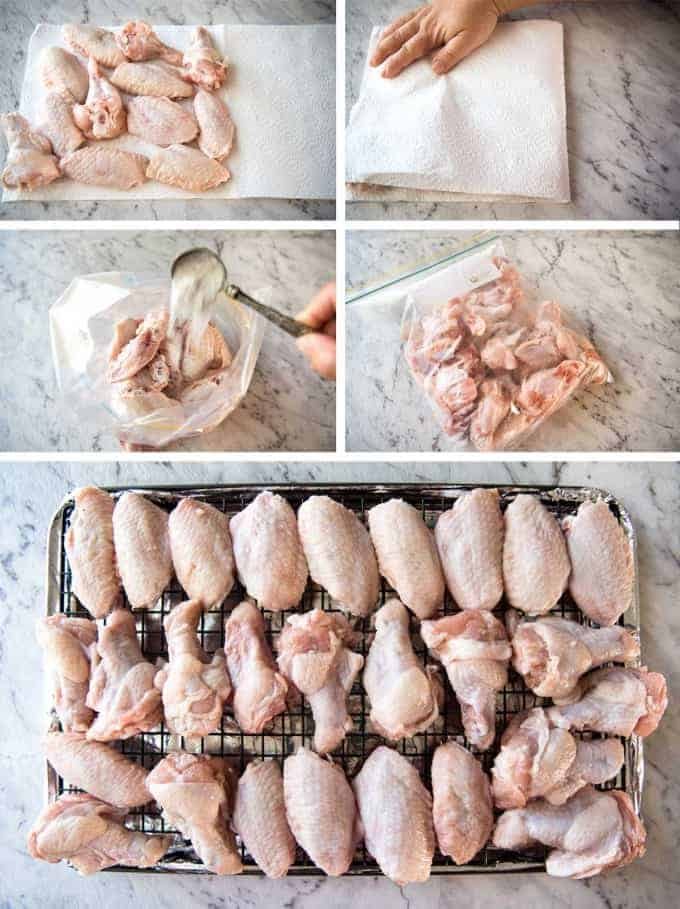
Pat wings dry with paper towels;
Toss wings in baking powder and salt;
Bake at 120°C/250°F for 30 minutes, then at 220°C/425°F for 40 – 50 minutes until golden brown and crispy.
Yes, that’s it. That’s all there is to it. 🙂

Why this recipe works
In those 3 simple steps are 2 very important things to make these truly crispy oven baked wings:
1. Coat in baking powder – yes, you read that right, baking powder! I won’t go into all the technicalities, but in a nutshell, the baking powder draws moisture to the surface of the skin so it can evaporate, thereby making the skin crispier; and
2. Bake for 30 minutes on low to melt the fat before blasting in a very hot oven to crisp up the skin. There’s a lot of scientific explanations around this and I’ll skip it because I’ll bore you! But basically, the wings are first baked on the lowest shelf in the oven at a very low temperature for 30 minutes which causes the fat under the skin to “melt”, then you move the wings up to the top shelf and crank up the heat which crisps up the skin.
The other tip is ensuring that the wings are dry. If you are organised enough, put the wings on the rack and refrigerate, uncovered, overnight. However, I neither have the fridge space nor am I organised enough, so I just dry them using paper towels (see photo below for how I do this).
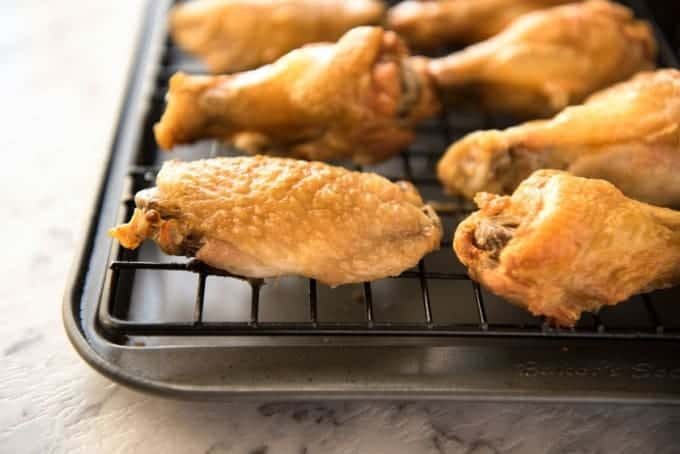
When these come out of the oven and you tap the skin with your nail, you can instantly “hear” how crispy the skin is. They even look like they’ve been fried! And in case you are concerned, you don’t taste baking powder at all.
Got questions? See FAQ under the recipe card.
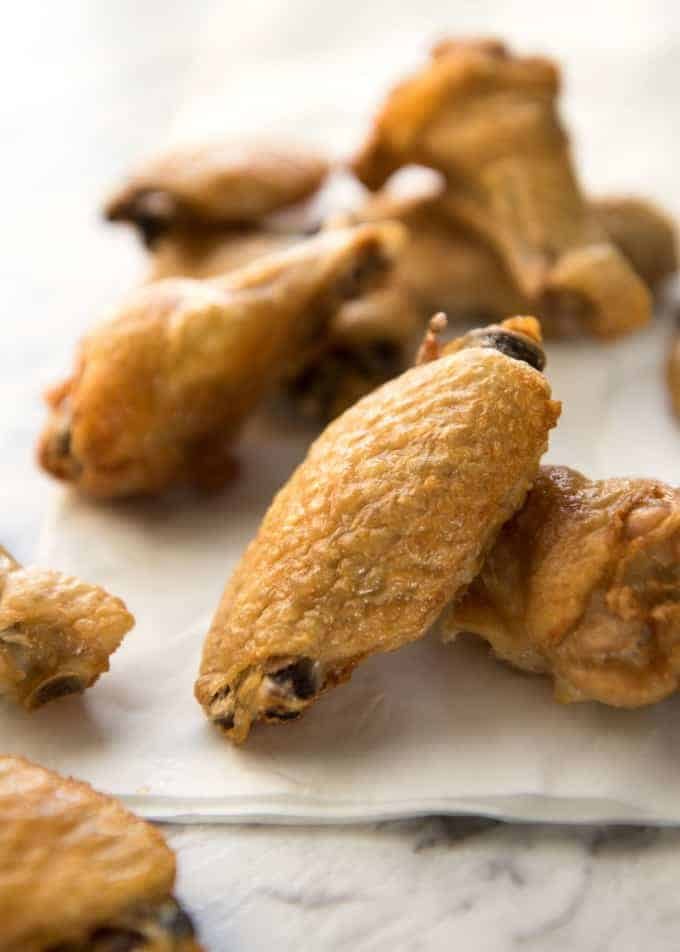
You will notice that the wings are smaller than you are used to. That’s because so much of the fat under the skin melts off the wings – you’ll see it all pooled on the tray. So these have the added benefit of reduced calories too!
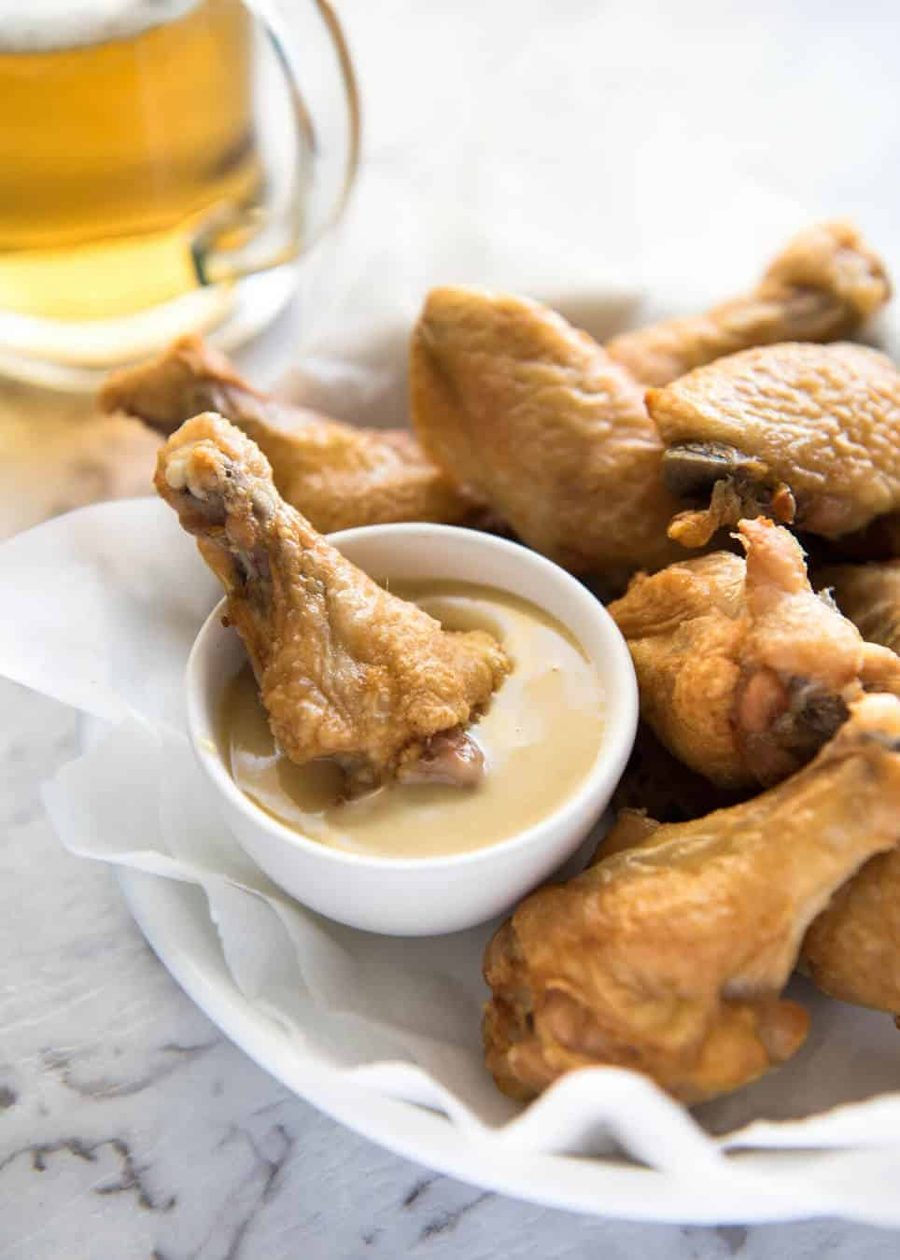
You can toss the wings in your sauce of choice or serve the sauce on the side. I’ve also shared classic Buffalo Wings using this same method for crispy oven baked wings. For this recipe, I’ve included a few simple sauces that I like to serve wings with: Honey Garlic Sauce, Honey Mustard Sauce, Ranch Dipping Sauce.
Let’s get stuck into these wings! – Nagi x
PS I’ve now published the Buffalo Wings version! Here it is: Truly Crispy Oven Baked BUFFALO Wings.
Watch how to make it
Hungry for more? Subscribe to my newsletter and follow along on Facebook, Pinterest and Instagram for all of the latest updates.
Truly Crispy Oven Baked Chicken Wings
Ingredients
Crispy Wings
- 4 lb / 2 kg chicken wings , cut into wingettes and drumettes (Note 1)
- 5 teaspoons baking powder (NOT BAKING SODA / BI-CARB SODA!!)
- 3/4 teaspoon salt
- Oil spray
Instructions
Crispy Wings
- If you are organised enough, uncover the chicken wings and leave them in the fridge for a few hours to dry out. Otherwise, use a paper towel to pat the wings dry.
- Adjust oven racks to upper-middle and lower-middle positions.
- Preheat oven to 250F/120C (all oven types – standard/convection/fan).
- Line a baking tray with foil, then place a rack (like a cooling rack) on the foil. Spray the rack with oil spray.
- Place wings in a large bowl or in a ziplock bag. Add the baking powder and salt, then toss to coat evenly.
- Place the wings on the baking tray in a single layer with the skin side up. They should just fit snugly. They will shrink when they cook because the fat renders out so don’t worry if they look too snug.
- Place wings on the lower middle oven rack and bake for 30 minutes.
- Move wings up to the upper middle rack and increase the oven temperature to 425F/220C. Bake for 40 – 50 minutes, rotating the tray halfway through.
- Remove baking tray from the oven and let it stand for 5 minutes.
- Toss wings in sauce of choice or serve it on the side to dip / drizzle on the wings, then serve.
Recipe Notes:
* Honey Garlic Sauce: Mix together 4 tbsp honey, 2 tbsp soy sauce, 2 tsp white vinegar (or sub with any other vinegar except balsamic), 2-3 garlic cloves, minced. Use for dipping OR tossing.
* Honey Mustard Sauce: 1/4 cup Dijon mustard, 1/4 cup mayonnaise 1/4 cup honey
* Ranch Dipping Sauce: Mix 1/3 cup mayonnaise, 1/3 cup sour cream, 2 tbsp milk, 1 tsp lemon juice, 1/4 tsp EACH dried dill, parsley, chives, onion and garlic powder, salt & pepper to taste.
* Spicy Creamy Dipping Sauce: 3/4 cup mayo, 1/2 tso garlic powder, 1/8 tsp paprika, 3-4 tbsp sriracha, salt & pepper
* Pink Sauce: 1/2 cup mayonnaise, 2 tbsp sweet chilli sauce, 2 tbsp ketchup, 2 tsp garlic powder, 1 tbsp sriracha (or other hot sauce) 7. Nutrition: The nutrition is per serving, assuming 8 servings. Note that the calories is HIGHER than it actually is because so much fat is rendered out (melted) and discarded which is not reflected in the nutrition below. I measured the discarded fat once and calculated that it should be 60 calories LESS per serving (around 1/4 cup fat in total was discarded).
Nutrition Information:
Originally published in November 2014, updated with fresh new photos and step by step photos!
Frequently asked questions
I don’t have a rack. Does this cause a problem? The skin will still be crispy but the bottom of the wings that is in contact with the tray will be oily. This is because the purpose of the rack is to elevate the wings off the tray and allow the chicken fat to drip down.
One way to get around an oily underside is to take the wings out after around 35 minutes during the high temp cooking. Drain the oil out of the tray then return to the oven to finish crisping/browning. You could also drain the excess oil from the wings on paper towels before serving.
Can I make ahead? These stay crispy for as long as the wings are warm, so around 20 – 30 minutes. After that, the skin starts to wrinkle and soften. However, I was shocked how well they reheat! Just allow the wings to cool (uncovered), then cover and refrigerate. Spread wings out on tray, skin side up, and bake for 5 to 8 minutes at 200C/390F. The skin smooths out and puffs up, just like when they were baked fresh. Other than to you (if you’ve made as many wings as me!) and true hard core Wings experts, the difference in juiciness and crispiness is barely noticeable – my friends never notice when I reheat!
The skin stays crispy for around 10 – 15 minutes after tossing in the sauce, then after that they start to soften but not go soggy, up to around 30 minutes. If you reheat after tossing in sauce, they go soggy.
Please do not toss in baking powder then refrigerate or freeze, this won’t work (makes the wings sweat too much to become crispy).
Can I add seasonings? You sure can! It does marginally reduce the actual skin crispiness but a crust forms from the extra seasonings/spices and adds more crunch. I did a lot of testing around this and I can assure you it works really well!
There was a lot of smoke! Help! A few readers have had this problem and I don’t think it’s from the chicken wings because I’ve made a ridiculous amount of these wings (in my kitchen and others) and never had the problem. The problem may be: a) spillage of chicken fat onto the oven burners when transferring from the lower to the upper shelf or b) there already was fat on the oven burners. I can’t think of anything else. While the smoke point of chicken fat is below that of the high oven temperature used in this recipe, the fat is not in direct contact with the heat because it’s shielded by all the wings and diluted by chicken juices dripping into the fat.
You really don’t need to flip? Really! Even if you don’t use a rack, the underside will get crispy.
Can I make this with other cuts of chicken? Yes BUT the crispiness will only work on the skin. So it works best on wings because they are almost fully enclosed by skin. With drumsticks, thighs and skin on breast, they are not fully encased with skin when raw and the skin shrinks while cooking. But the actual technique works super well! For 1 kg / 2 lb drumsticks or other cut of chicken, using 2 tsp of baking powder and 1/4 tsp salt – less than the recipe for wings because there is less skin surface area.
Life of Dozer
No wings for Dozer – cooked chicken bones are dangerous for dogs! How about a Honey Prawn instead??

Amazing wings…My husband has always complained oven baked wings were too soggy. He gobbled this up as did my kids. No one could believe how crispy they got on the outside with juicy flavor still on the inside. Didn’t try the sauce. Put 1/2 in buffalo sauce after they came out of over and kids dipped in BBQ sauce. Will definitely make more!
I’m so glad!!! YAY!!!
Hello, I’m curious to know if this would work if you’ve brined and then marinated the wings first, then dry out the wings and coat with salt and baking powder.
Hi Diane! I’m sorry, I’m not sure that will work. Brining changes the skin and in fact, bringing makes the skin crispy too, just not as much as baking powder. I’ve never tried both together and I can’t guess what the outcome would be. Sorry!
Wow! I have been looking for something like this and boy oh boy these are yummy!
I cooked half of them in our new air fryer and they cooked up even faster. My whole family loves these, and the sauce is amazing. I added rice vinegar and Tamari in place of regular soy to the sauce and it was a hit.
YAY! I’m so glad you and your family love this Mary!!
I did the same with the rice vinegar and Tamari but Aldo added chipotle to make the a bit spicy.
These were GREAT! Everyone loved them even better when they realized that they were homemade AND not fried. I added a little sesame oil to the sauce. Not sure how or why this works but am so glad to know this awesome trick. I only made two packages of drumettes and wish I’d made more, too. Thanks!
YAY! I’m so glad you enjoyed these!!!
truly the best! I make them all the time now, my husband who is ‘picky’ about anything fatty, loves these! I’m looking forward to making your bread bites next weekend! Seriously, congratulations on your recipes?
YAY! So glad even hubby loved these!!!
Yaaaaaaaaaassssss….they were great….i tossed them in my special garlic teriyaki sauce. …my husband doesn’t usually eat sweet sauce on his chicken. ..let’s just say he loves it know….i only cooked a few because i wasn’t sure how they would turn out….i wish i would have cooked more!!!!!….thanks again!
YAY YAY YAY!! So glad you loved them!!! N x
Thank you for this amazing recipe! My daughter and I both love it (which in itself is a feat since she’s 15 and it’s just not cool to like what mom likes). I don’t use the sauce on mine since I am still in induction but mini me really likes it…a lot. This is our “go-to” wing recipe ?
I want to try these tonight. They sound delish! But was wondering what other sauces you might have, like maybe bbq. My daughter doesn’t like soy sauce and I don’t like buffalo sauce. Lol. Thanks and wish me luck.
Hi Beth! I have a stack of sauces in the wings cookbook! Yes BBQ would of course be fabulous, classic honey mustard, ranch, sweet and sour – YUM!!!
Hi Nagi, thanks for the recipe! Can I know if I should set the oven function to bake or roast?
Hi Chloe! Schmancy oven you have – jealous! 🙂 Roast will work a touch better. Hope you love!
I tried making these tonight, I on the other hand had large whole wings and large legs and I ended up leaving them in the oven at 250 for 1 hour and they had not rendered fat at all the baking powder was still dusted all over the wings and when you touched them they still felt raw. I put mu over thermometer in the oven to make sure the temp was right and it was. I then turned it up to 325 and cooked them another 30 min at this point it looked like they were cooking a little (turning opaque) but the coating of baking power was still all over the wings. I have now taken them out and am now cooking them in oil. I don’t think I will try this again.
Hi Kristie! I’m sorry you had this problem. The fat on the wings do not melt during the period it is in the oven at the lower temperature, they soft and start to melt. The fat renders out when the oven is turned up – which should be to 425F not 325F. I promise that if you follow the recipe instructions, it certainly does work – as the many hundreds of comments below can attest to! 🙂
I made these last night and when I turned up the oven to 425° it took the full 50 minutes to render the day and crisp up! So good, these will be a main stay in our house! Going to change up the sauce ( tho the garlic honey was amazing!)
I’m SO GLAD you loved it Cathy!!!
I tried these today and they were amazing! I initially forgot to turn the temperature up to 425F after doing the 250F and was confused as to why they were cooking so slowly. After I realized this and turned up the temperature they turned out beautifully!
Thanks for the awesome recipe! 🙂
YAY! I’m so glad you loved them Renee!! 🙂
Thx for the awesome recipe, Nagi – my daughter and I made them tonight since she had a craving for honey- garlic wings, and yours fit the bill and then some! I especially like the “fat-melting” part and that they were done in the oven instead of using a ton of oil in a deep fryer. I’m curious if there’s a particular type of honey that you like to use – I only have raw honey in the pantry and my daughter said, “Don’t we have any normal honey?” Lol! Yes, she’s a teenager! 🙂
Hi Lisa! Gosh, I’m with your daughter, I use “normal” honey!! I’m so glad you and your daughter enjoyed this. And yes, I love the fat melting part too!! It always makes me feel less guilty seeing how much fat ends up on the baking tray instead of in my stomach…..also the reason I feel like I can have just one more, just one more…. 😉
Hi! I have my wings uncovered and drying… My big issue is, the wings we bought are already mesquite seasoned… will that ruin the process with the baking powder?
Hi Rebe! I’m sorry for the delay responding, I was without internet for a while. Having the seasoning already on the wings will affect the crispiness a bit but it is still really crispy and worth doing! To make seasoned wings, I do it the other way – baking powder first THEN seasoning. 🙂
No worries! The wings were bought with the seasoning so there wasn’t much I could do about it (this time) but I am happy to report they still came out very crisp and super delicious! The meat was still tender and juicy inside, while the skin was perfectly crunchy and crisp. A family friend liked them so much he didn’t even want any sauce. Thanks so much for the fat rendering tip, that made such a difference! Keep on cooking on, thanks for sharing!
<3 <3 <3
PS- I didn’t have a rack to put under the wings, so I lined the tray with foil, then took a larger piece of foil and crumpled it up. That way the wings were still a little elevated and the fat could pool without the chicken soaking in it.
This easy-to-make recipe does result in very crisp skin. although the chicken pieces were dries very well prior to baking the underside came out very ‘soggy’. The chicken pieces were baked as suggested on a cooling rack placed on foil lined cookie sheet. When it was moved to the top rack, the grease dripping on the cookie sheet spit and splattered all over the oven making a HUGE mess. As the grease splattered on the oven elements it produced smoke which quickly filled the kitchen. We had to open all the doors to air out the house so the smoke alarm wouldn’t trigger. Doubtful this recipe will be used again.
Hi Ann, I’m sorry that you had that problem. If you use a baking tray as suggested in the recipe, rather than a cooking sheet, then it has a rim so the grease drippings do not spill when you transfer it.
Regarding the underside of the chicken being soggy, that’s rather odd because the elevation of the wings using the rack is what makes it crispy on the underside and all I can think is that the smoke cause by the spilled grease on the elements somehow affected the way the wings were cooking.
Wish I could have been in the kitchen with you to help troubleshoot! 🙂 – Nagi
Thanks for the reply, Nagi. I did use a baking tray which had a rim. This morning I will be cleaning the mess in the oven :o(
Hi Nagi, great i stumbled upon your recipes. Will try it! May i know if it is possible to coat the wings with the Honey Garlic Sauce and pop it in the oven?
Hi Deshana! Unfortunately not because it won’t come out crispy. 🙂 So toss it in the sauce after baking it!
Thank you For your reply Nagi. ??
I tried this receipe few mins ago.
I did not have a rack so I put the wings right on the foil(pan).. mine turns really crispy but it was little too dry… do you think its because of the wing size? (Im in korea and.. they only got tiny wings) hahaha I was practicing this for upcoming halloween party…. any suggestion?
Hi Angela! Gosh, I didn’t think to update this for wing size! I know exactly what you mean about tiny wings in Asia – also, those really tiny ones have a lot less fat. And yes, it would be because of that. Reduce the initial baking time on the lower temp to 20 minutes and reduce the baking time at the higher temp to 30 minutes. That should do the trick. 🙂
Thank you so much!!!
I guess I am going to have another wing night!
I will try shorter time and tell you again!! thank you so much 😉
By the way I accidently gave this recipe one star. it worth more!!
Is there a way to make this with the fat (or most of it) intact? i would love to keep the fat in if I could keep it in AND make the wings super crispy. I’m looking for a baked wings recipe that makes them crispy and this one seems promising but could I keep the fat?
Thank you!
Unfortunately using this baking method a lot of the fat melts from under the skin BUT it does not make it dry at all. The wings are still very juicy and fatty because the fat melts INTO the meat as well as the excess dripping onto the baking tray. I do hope you still try it though! I promise it is sensational!!! 🙂
This recipe actually works! For the first time ever I have crispy baked extremely delicious chicken wings! Thank you I only two cloves of garlic in the dip and added a bit of sirracha sauce too totally yimmy 🙂
BA HA HA!! I was like that too when I first tried this recipe! Welcome to the world of crispy BAKED wings. 🙂 You will never look back!! N x
I have been using flour to coat my wings. I dust them, lay them out on parchment paper on a cookie sheet, and place them in the fridge for an hour, then off to the oven. Fabulous!
Hi Dave, I used to do that too! I really encourage you to try this baking powder version, it will knock your socks off, promise! 😉 N x
This was my third time trying to make wings and they were fabulous, family was kicking their fingers! I used just a bit too much baking powder so will adjust next time. I too added just a touch of fresh black pepper and didn’t have honey so used maple syrup instead. Yummy!
I’m SO GLAD you enjoyed it Dana!! YAY!