
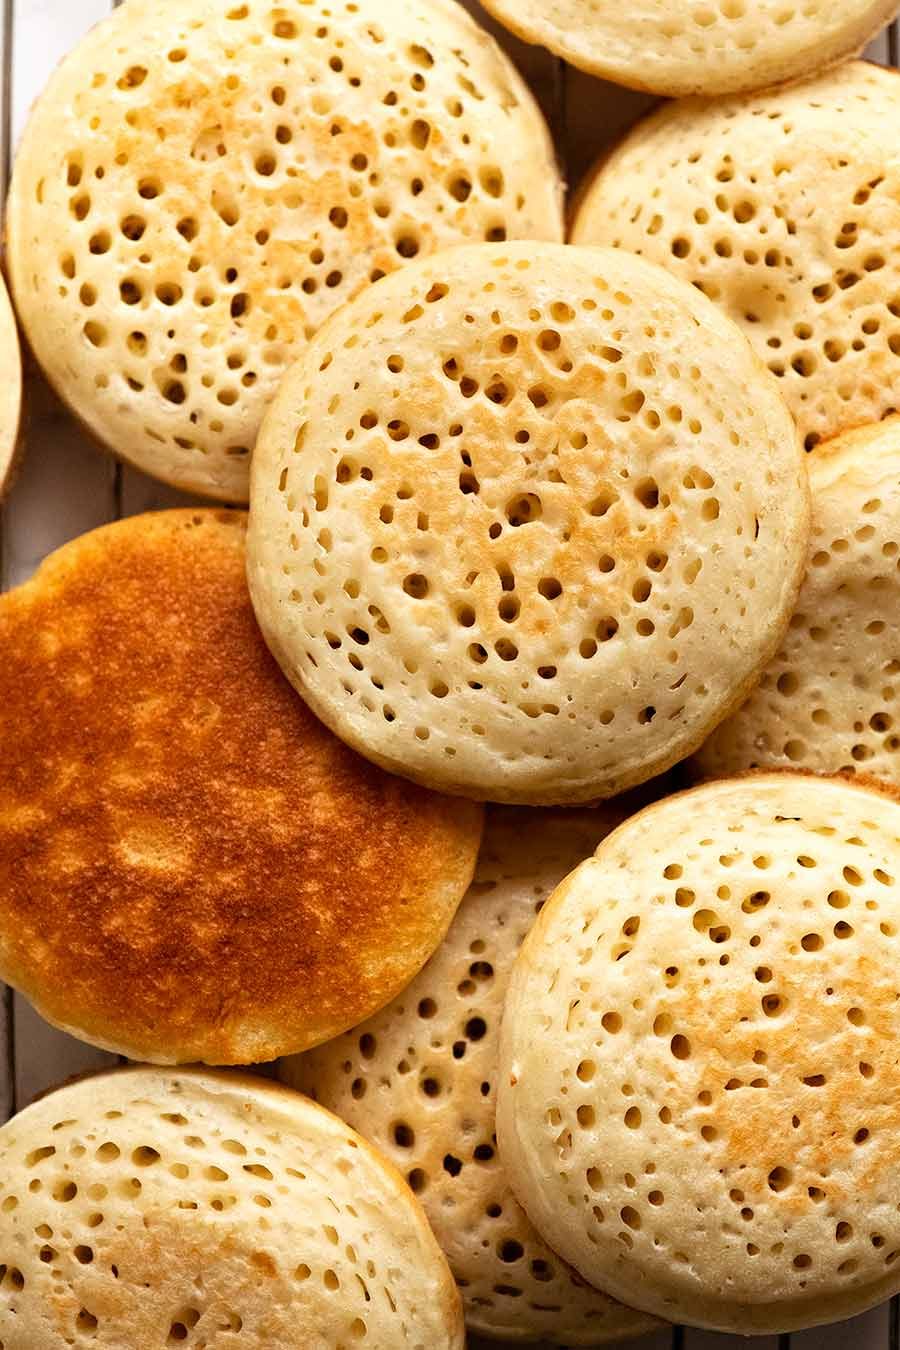
This is the crumpet recipe released by Warburtons, the UK’s biggest commercial crumpet maker. They’re an absolute dead ringer for store bought – except far better – with the signature holes, distinct “spongey” texture, perfect for toasting. If you’ve ever wanted to know how to make a crumpet, this is going to blow your mind! And it’s easy!
Crumpet recipe
Warburtons is the UK’s biggest and most popular commercial crumpet producer. They make over 700 million of them a year!
To cheer up the UK public during lockdown, they shared their secret crumpet recipe for people to make at home. Though I doubt it’s the precise commercial batter recipe (they probably adapted it for the home cook), the end result is EXACTY like store bought crumpets.
After many, many, MANY failed crumpet attempts over the years (even from notable chefs!), I am still shaking my head at how astonishingly perfect these crumpets are – and how easy they are to make!
What are crumpets?
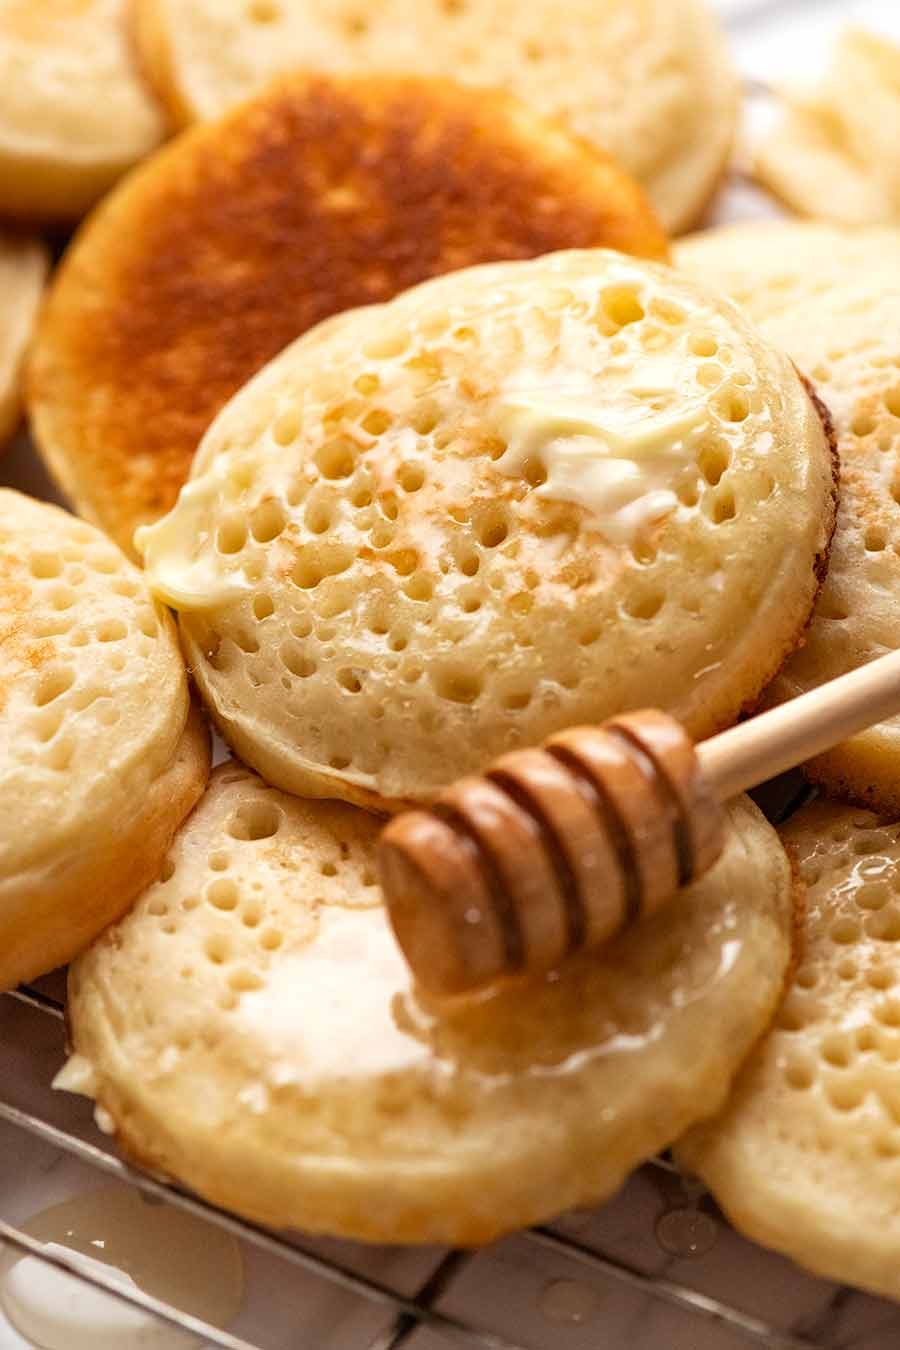
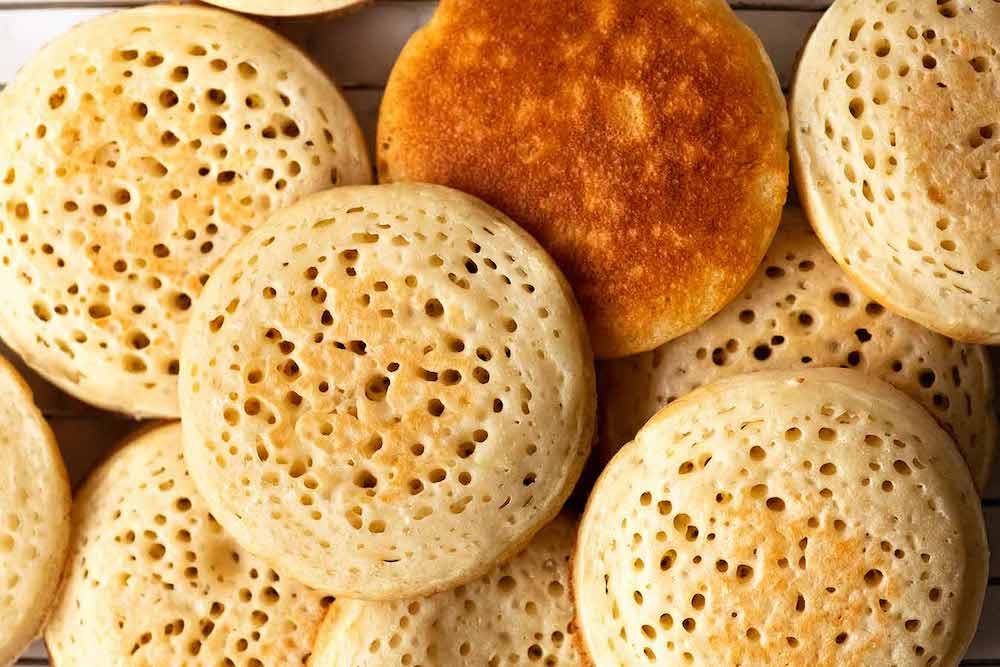
Hailing from England, they’re like a cross between an English muffin and pancakes. Their distinguishing feature is the surface that’s riddled with holes which allows butter to permeate through from top to bottom. The surface has a unique almost “spongey” texture, but it’s very fluffy inside, just like bread!
What goes in crumpets
Here’s what you need to make crumpets. I always knew yeast was in the batter. The addition of baking powder was the key that made all the difference – from crumpet making fails to crumpet making success!
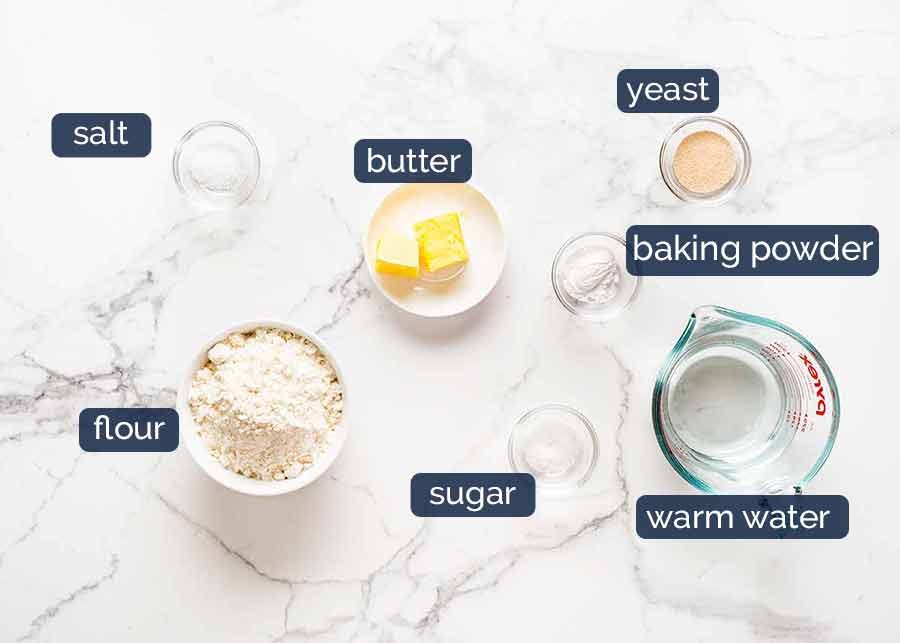
Yeast – use instant / rapid rise yeast or active dry yeast (sometimes just labelled “yeast”). Both work just fine.
Fresh yeast? Haven’t tried with fresh yeast but see no reason why it wouldn’t work using the standard conversion of 7.75g / 0.275 ounces fresh yeast per 1 teaspoon of dry yeast. Crumble into warm water with sugar and follow above directions for active dry yeast.
Flour – just normal plain / all purpose flour. Not self raising flour, not wholemeal flour.
Gluten free – unfortunately doesn’t work with gluten free flour. We tried, and it was a dismal failure!
How to make crumpets
Here’s how to make crumpets in 3 easy steps:
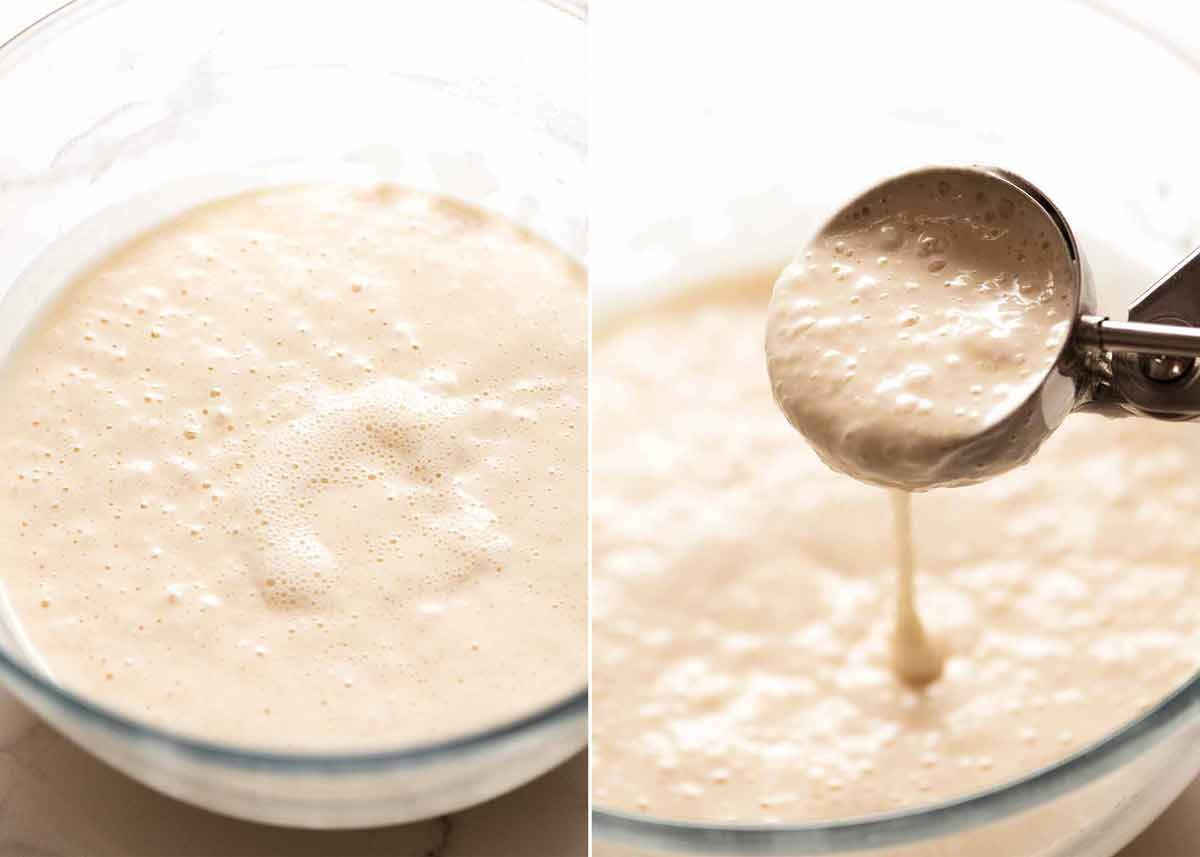
Mix water, flour and salt to form a sticky but stirrable batter. Then mix in yeast dissolved in a bit of water, baking powder and sugar to form a smooth batter;
Leave in a warm place for 30 minutes until the surface gets foamy; then
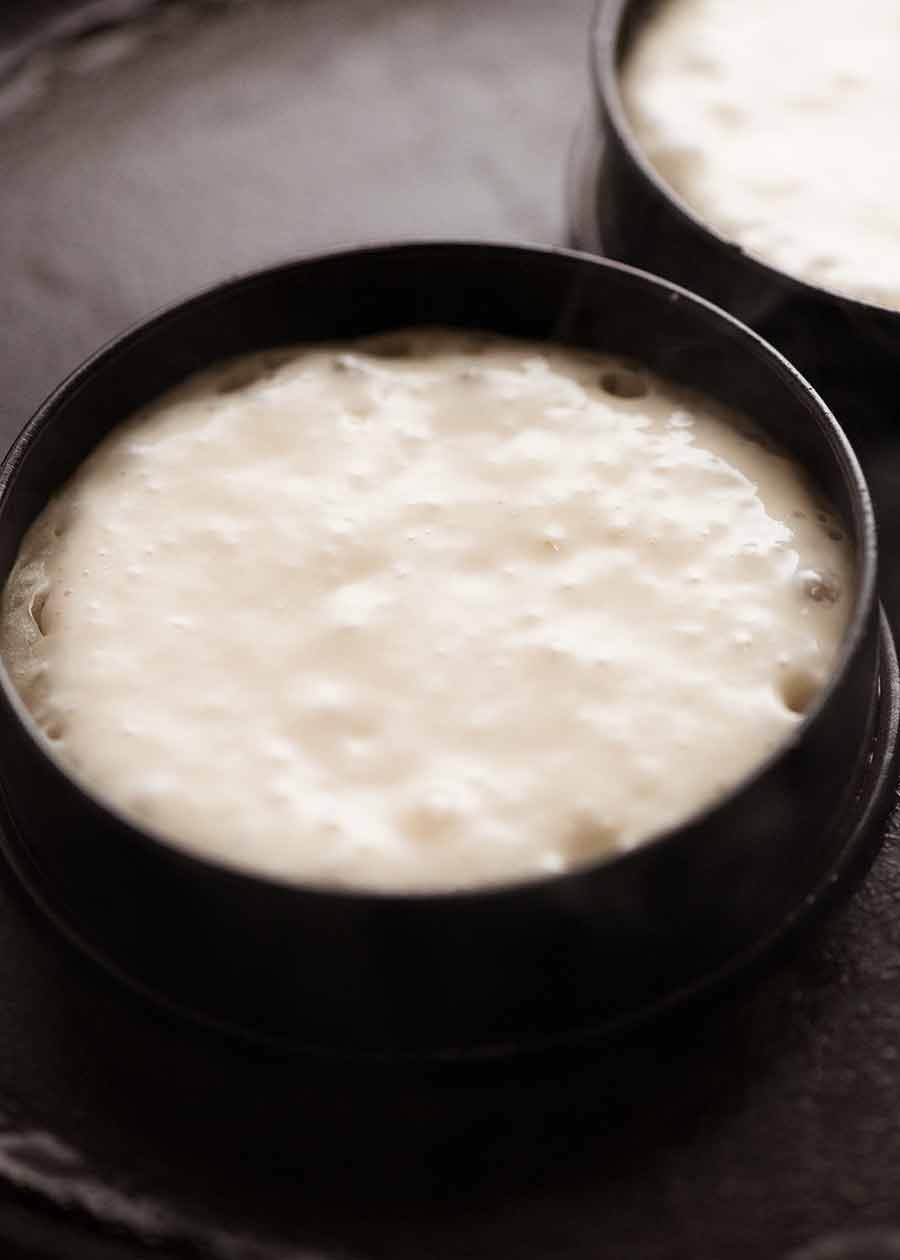
Ladle into rings and cook on the stove until bubbles pop on the surface and the top is cooked.
It is quite straightforward, but because homemade crumpets is a bit of a unique recipe, I’m going to add a bit more information about each step in the proceeding sections. If you’re not interested, jump to the recipe! (Or video – or Dozer 😂)

The crumpet batter
The crumpet batter is literally a dump-and-mix job, though you do need to mix well for a couple of minutes by hand (or half that time using a handheld mixer) which I assume is to get good gluten formation to get that signature chew for any type of yeast bread, as opposed to being “cakey”.
Then once mixed, you simply put it in a warm place so it gets nice and foamy. This is the equivalent of dough rising so the crumpets rise when they’re cooking.
The crumpet batter won’t increase in volume very much – just around 10 / 15%.
Crumpet rings
Crumpet rings are a “thing”. They are around 9 cm / 3.5″ wide and about 2.5cm / 1″ tall. The ones I have are non stick, but they come in silver too.
But honestly, anything metal and round will do the trick – egg rings, biscuit cutters, scone cutters, even cleaned large tuna cans. Actually, it doesn’t even have to be round! Star shaped crumpets, anyone??
Cooking crumpets
Now, I’m not going to lie to you – you probably won’t nail the first one. It does take practice – but no more than when you first started out perfecting the art of golden fluffy pancakes or pikelets!
The secret to cooking crumpets perfectly is to start them off on a high heat to get those bubbles activated, then turn the stove down so the crumpet cooks through without burning the base. The cooking technique is one change I made to the original Warburtons recipe – they say to cook on medium high the whole time = scorched base.
Though store bought crumpets don’t have colour on the holey side, I like to flip to get a blush of colour on it and cook any residual raw batter.
And here’s a close up of the inside of the crumpets with the signature vertical “tunnels” from the holes!
Even better the next day!!
An essential step with crumpets is to cool them completely, otherwise they are kind of moist and “doughy” inside.
In fact, if you want an absolute dead ringer for store bought crumpets, they are best made the day before, or the day before! They keep for days in the fridge – I’ve kept them for 5 days and once toasted, they are perfect.
Can you freezer homemade crumpets?
They freezer perfectly too. Thaw or even microwave thaw, then toast as usual!
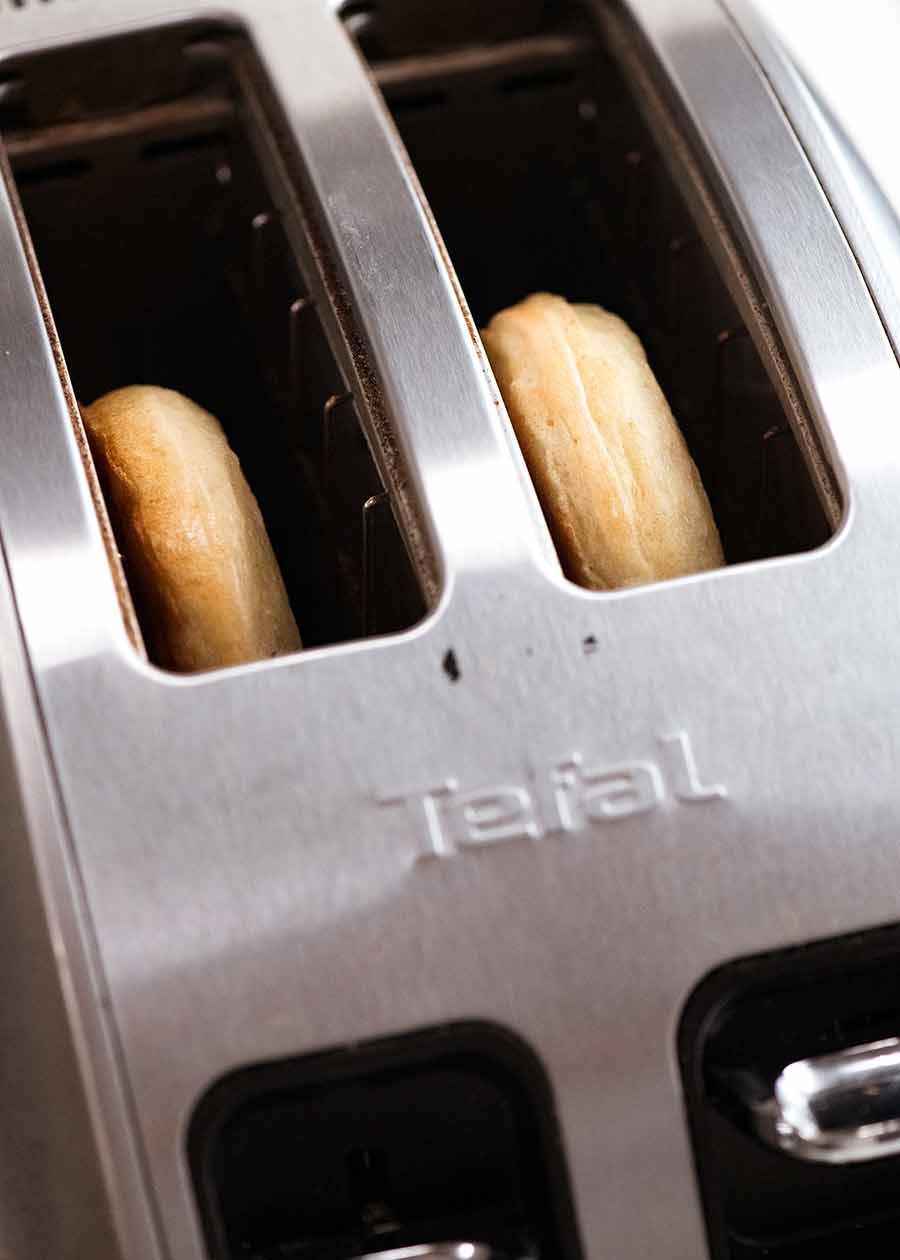
How to eat a crumpet
I realise that writing about how to eat crumpets may induce eye rolling from Crumpet-Eating-Experts. But bear with me – not everyone has been eating crumpets all their life!
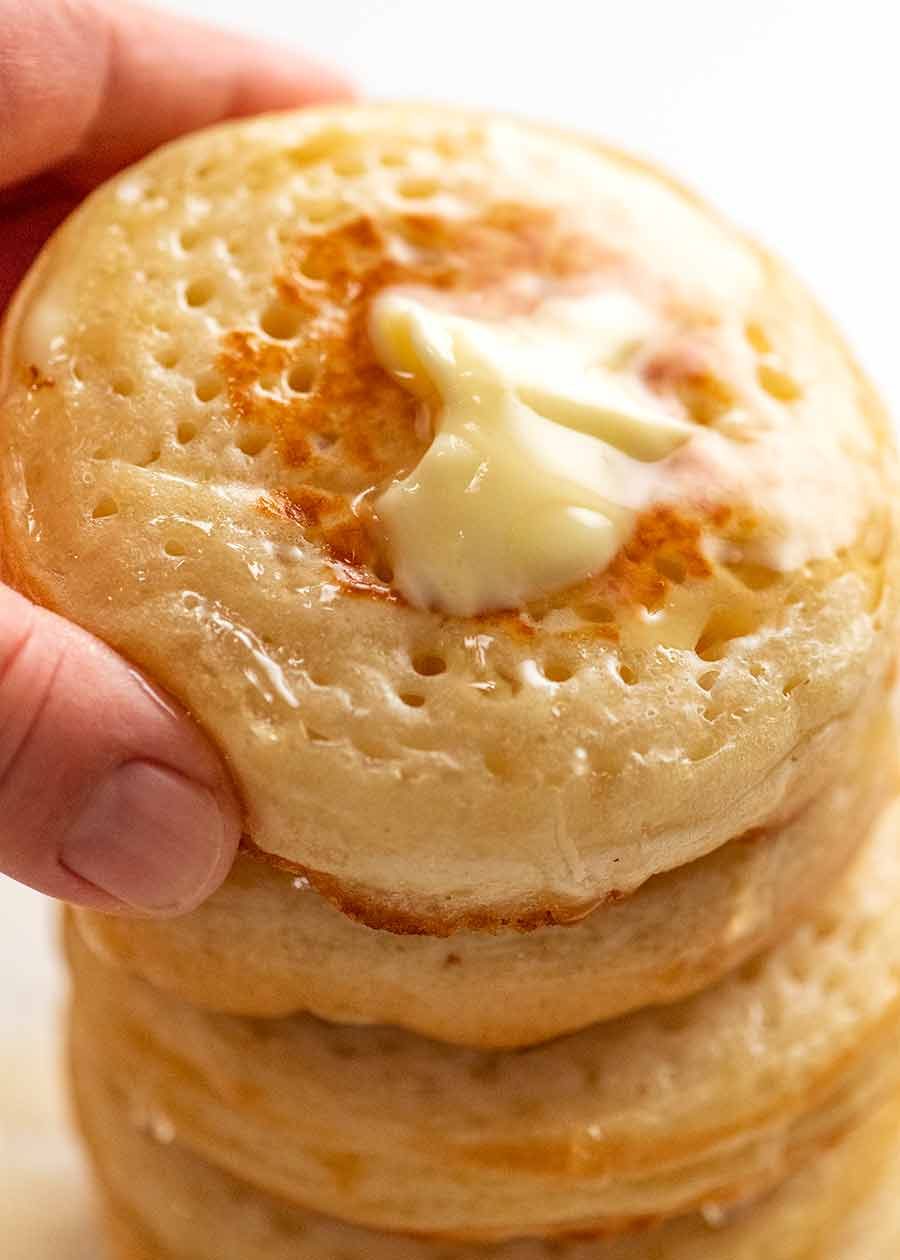
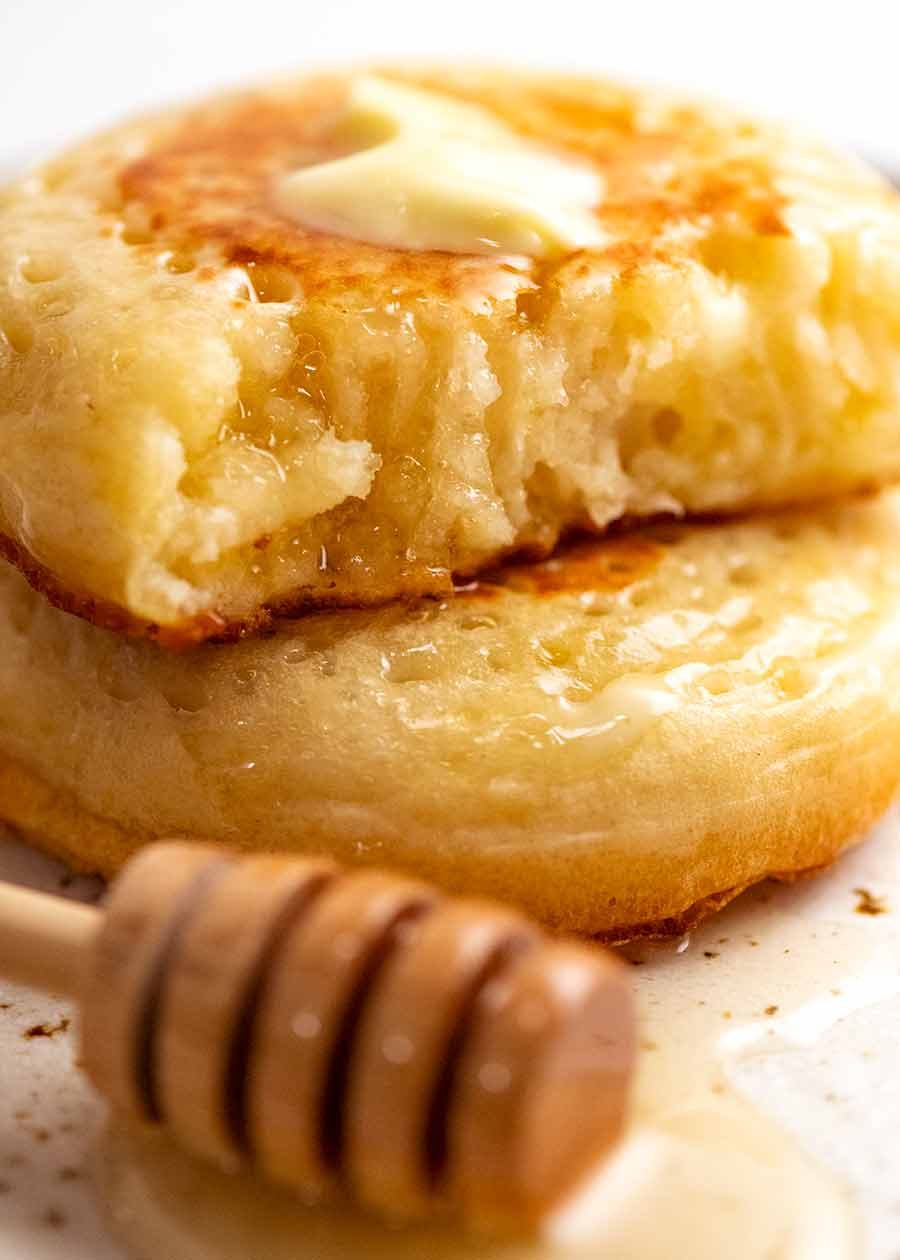
Toasting is essential to make the golden base crispy. Then slather with butter (what do you think all those holes are for?? So the crumpet gets soaked with butter, from top to bottom!) then spread of choice.
What to put on crumpets
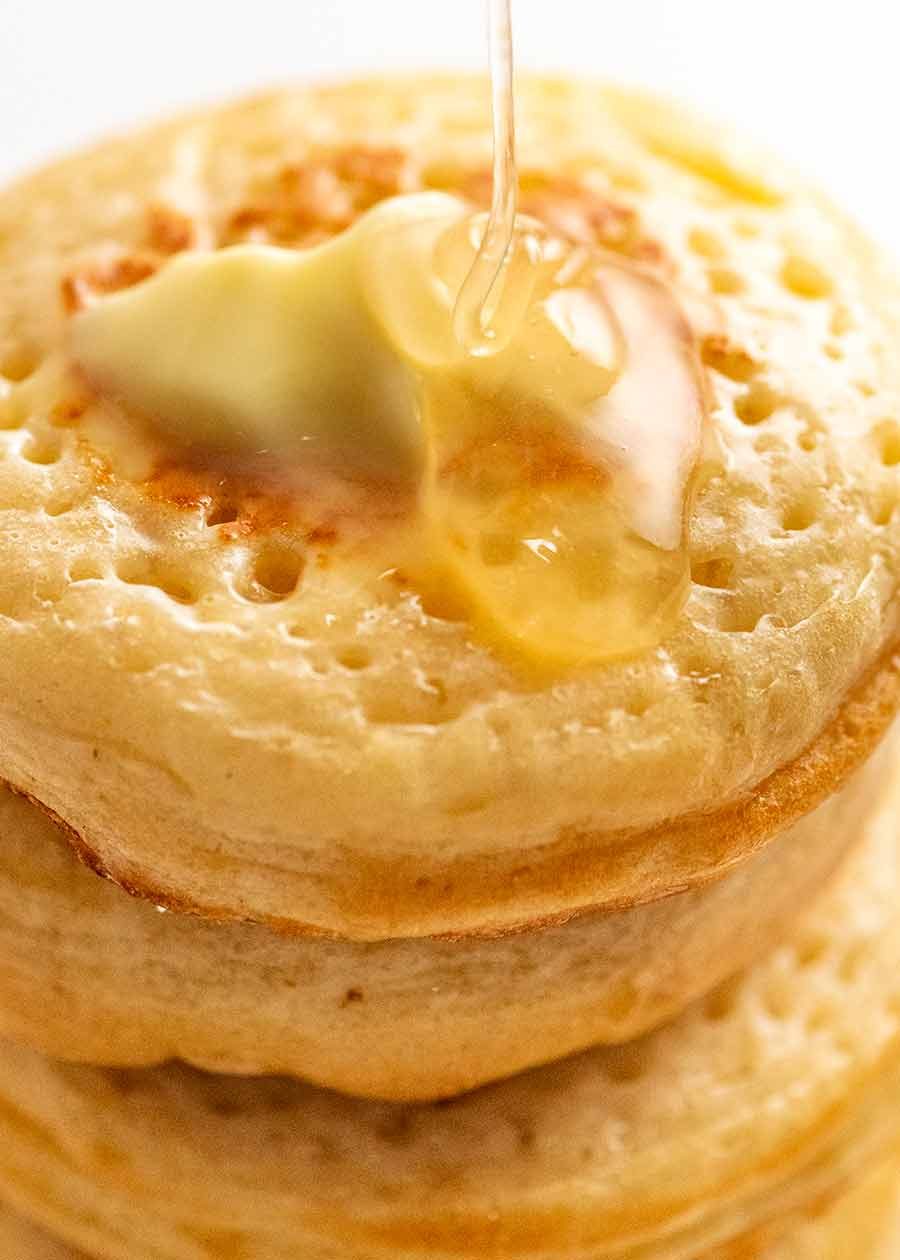
As far as what to put on crumpets (other than the mandatory butter) – honey is by far the top choice (think – hole seepage). My personal second choice is Vegemite (it’s an Aussie thing 🇦🇺), followed by jam. Other spreads like Nutella and peanut butter go great too – whatever you put on toast, you can put on crumpets!
Though if you want the ultimate crumpet experience, don’t go past butter and honey. That moment when you bite into the crumpet and salty melted butter and sweet molten honey squirts into your mouth…
Arrrgh … I’m torturing myself at the thought. I’m off to toast another crumpet for morning tea! – Nagi x
Watch how to make it
Hungry for more? Subscribe to my newsletter and follow along on Facebook, Pinterest and Instagram for all of the latest updates.

Crumpet recipe
Ingredients
- 150g (1 cup) white flour , plain / all purpose
- 200ml (3/4 cup + 1 tbsp) warm water , tap water (200g) (Note 1)
- 1/2 tsp salt , cooking/kosher salt (1/4 tsp table salt)
- 1/2 tsp white sugar
- 1 tsp baking powder
Yeast Mixture
- 1 tsp yeast , instant/rapid rise OR dry active yeast (Note 2)
- 1 tbsp warm water (just tap water)
Cooking:
- 2 tbsp unsalted butter , melted (or vegetable oil)
Instructions
Crumpet Batter:
- Place flour, water and salt in a bowl and whisk for 2 minutes (electric beater 1 minute on speed 5).
- Yeast Mixture – Dissolve Yeast into 1 tbsp warm water in a small bowl.
- Add Yeast Mixture, sugar and baking powder into bowl, then whisk for 30 seconds (or 15 sec speed 5).
- Cover with cling wrap or plate, then place in a very warm place for 15 to 30 minutes until the surface gets nice and foamy. It will only increase in volume by ~10 – 15%.
Cooking Crumpets:
- Grease 2 or 3 rings with butter (approx 9 cm / 3.5" wide, though any ring or metal shaper will do, Note 3) (TIP: Non stick rings – brush with melted butter. Everything else – smear with butter)
- Brush non stick skillet lightly with melted butter then place rings in the skillet.
- Turn stove on medium high (medium for strong stoves) and bring to heat (Note 4 for “sizzle test”).
- Pour 1/4 cup batter into the rings (65ml), about 1cm / 2/5" deep (will rise ~60%).
- Cook for 1 1/2 minutes – bubbles should start appearing on the surface (but not popping yet).
- Turn heat down to medium, cook for 1 minute – some bubbles should pop around the edges.
- Turn heat down to medium low, cook for a further 2 1/2 to 4 minutes, until the surface is "set" and it's clear there will be no more bubbles popping! (At this stage you can help the final bubbles pop with a skewer!)
- Remove rings (you might need to run knife around to loosen).
- Then flip and cook the other side for 20 to 30 seconds for a blush of colour.
- Transfer to write rack (golden side down) and fully cool.
- Can be eaten once cool, but it’s even better the next day (Note 5).
How to eat crumpets:
- Toast in a toaster until the base is crispy.
- Slather generously with butter, then spread of choice (honey is perfection) and devour immediately!
Recipe Notes:
Nutrition Information:
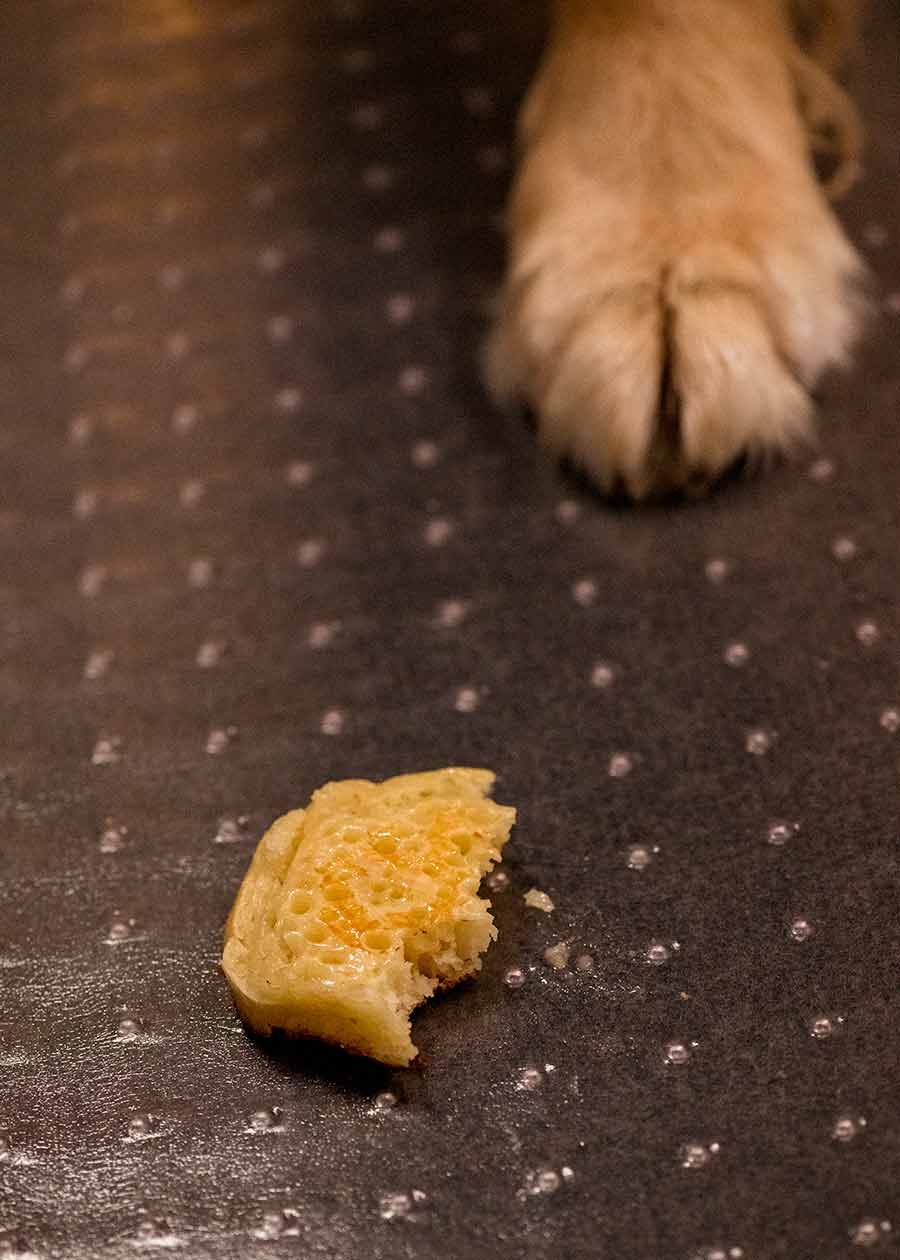
Life of Dozer
And every once in a while, his patience pays off and food I’m shooting falls to the ground….

The recipe works very well each time. My family keep saying they are very good.
I tried this recipe and it was so good it was very easy to make the stuff I already had I had in my cabinet and surprisingly it was really easy to make I’m definitely going to make this again
Fantastic! So easy to make and so tasty! It turned out exactly what I thought it would be. Thanks so much for great recipe, Nagi!
They rose more than 15% probably 25%. Turned out great. Need to keep a consistent size and height to master cooking time
Loved these! Have tried a few recipes to mixed results before; this one worked better.
I’ve finally invested in crumpet rings which make it far easier, but even gingerbread man cookie cutters worked well previously 🙂
Definitely a recipe to make multiple batches at a time.
This is a great recipe, shame it didn’t make more, I made four from the amount. Also, I used Tipo 00 flour. Will be making a double batch next time. Thanks for a great recipe 😊
I made 3 in the fry pan using egg rings brushed with melted butter & 6 in the pie maker as per a hint from the Facebook RecipeTin Eats Appreciation. I found they cook better in the fry pan & will invest in crumpet rings to get bigger ones. This is a great recipe, very easy to make & the crumpets are delicious.
Nagi, you’ve done it again. Instant hit in our house….hubby is already asking when I plan on doing these again.
What would I do without your website, doll?
Worked super well! Loved them. I had a trouble with the first couple but got the hang of it. Really delicious
Can this batter be made the night before (slow rise in the fridge) and just add the baking powder before cooking? Bring back to room temp first, or could I cook direct from fridge
Made it for the first time today and my entire family loved it!!😋😋 It will be on repeat mode!😅
Had a quick question – can I sub it with whole wheat flour – I’m a diabetic. Thanks much!
Could not believe my luck. A yeast recipe that only proofs for 1/2 hr. Grandkids overnighter and we needed breakfast. Never made crumpets before and these turned out GREAT!
Thanks so much for this! I always miss crumpets (living in Spain) and will never have to stuff some in my suitcase again – as these are far better than the shop bought ones!
Easy to follow and the results came out just like your pictures. I wish all recipes were as straightforward!
Thanks for sharing.
The recipe is perfect, the result was perfect but I’m afraid it’s too much work for the reward for me. Great recipe…A1 and thanks for sharing it.
This is the 4th crumpet recipe I have tried and this is the one that does it for me! Crumpets as I remember them, lots of holes for soaking up the butter – thanks so much
Absolutely delicious – had never thought of making these before and this recipe is the best – will never buy them again – thanks Nagi 🙂
Hi Nagi,i have just tried making your crumpets and for some reason they didn’t bubble.
What did i do wrong.
Double the recipe! After going through all the effort and patience of waiting for batter to rise, there’s never enough for everyone.
I will never buy crumpets again! Loved them even straight out of the pan, so will have to take Nagi’s word that they are better the day after, mine did not last nearly that long. Found them super simple to make, and I liked the egg ring size as well.
Perfect recipe as always – thanks Nagi!