
Ultra chewy, homemade muesli bars that are cheaper, tastier and much healthier than store-bought. Tastes like a chewy caramel studded with nuts and fruit! Excellent way to clear out random leftover nuts and dried fruit. Want crunchy muesli bars? Head here!
The case for homemade muesli bars
There’s some things that I’ll always (probably) buy from the shops. Like – potato crisps. And cheezels (I love ’em! Don’t judge me.😭)
But there’s some things that I’ll never buy, after discovering how good and easy homemade is. Muesli bars currently tops that list. (That’s granola bars, to those of you in the States!).
I actually bought a box of a popular brand here in Australia called Carmen’s so I could do a side-by-side taste test, homemade vs store bought. The texture is almost exactly the same. But the flavour of homemade is far superior. Put simply, you can taste all the ingredients better. Also, everything in homemade muesli bars is all-natural. No mysterious food additives or preservatives to survive on supermarket shelves!
We’re making chewy ones today
There’s an endless variety of muesli bar flavours available these days. Nut free, fruit free, chocolate chips, chocolate drizzle! With today’s recipe you can customise the flavour to your hearts’ content.
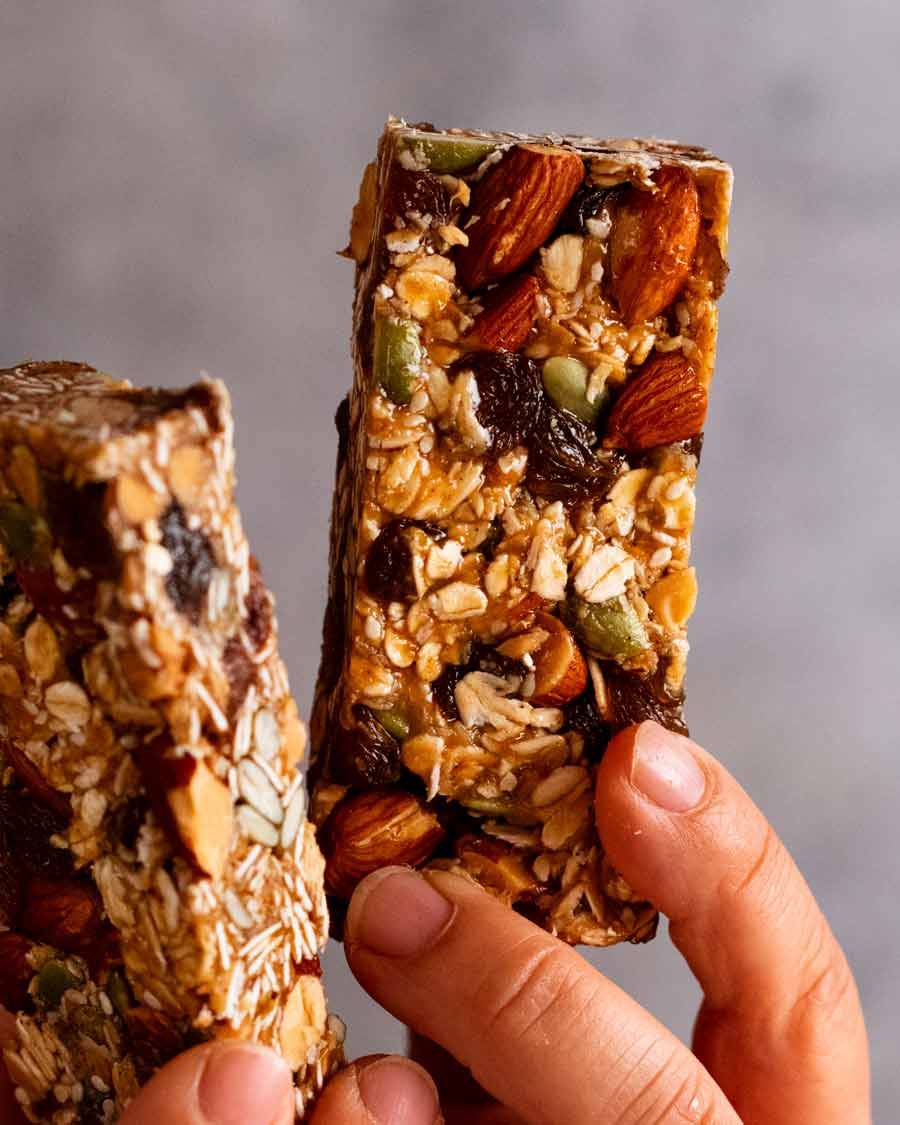
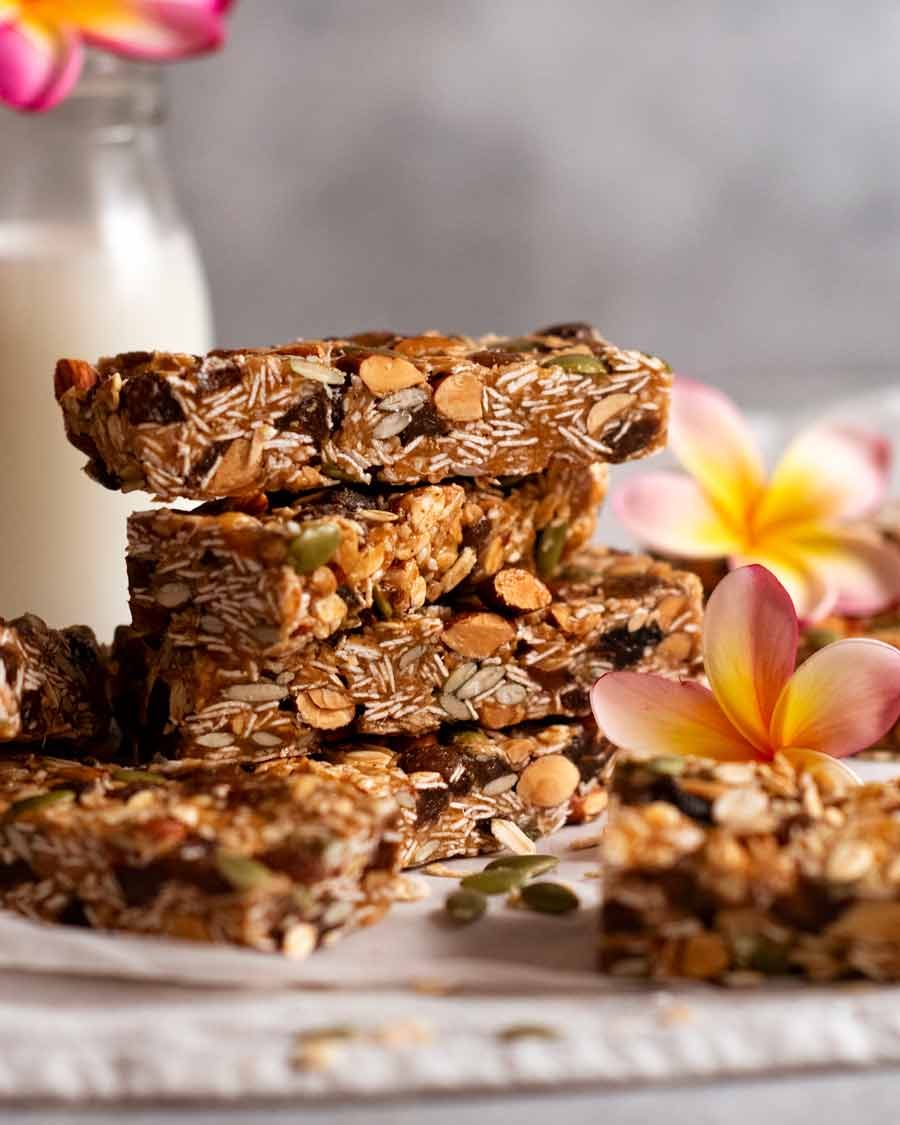
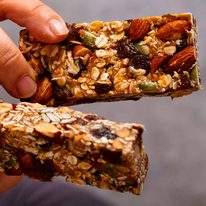
As for texture – broadly speaking, there’s two types: chewy and crunchy. We’re making chewy ones. And when I say chewy, I do not exaggerate. It’s like eating a chewy caramel – except you get to feel smug cause these muesli bars are good for you.
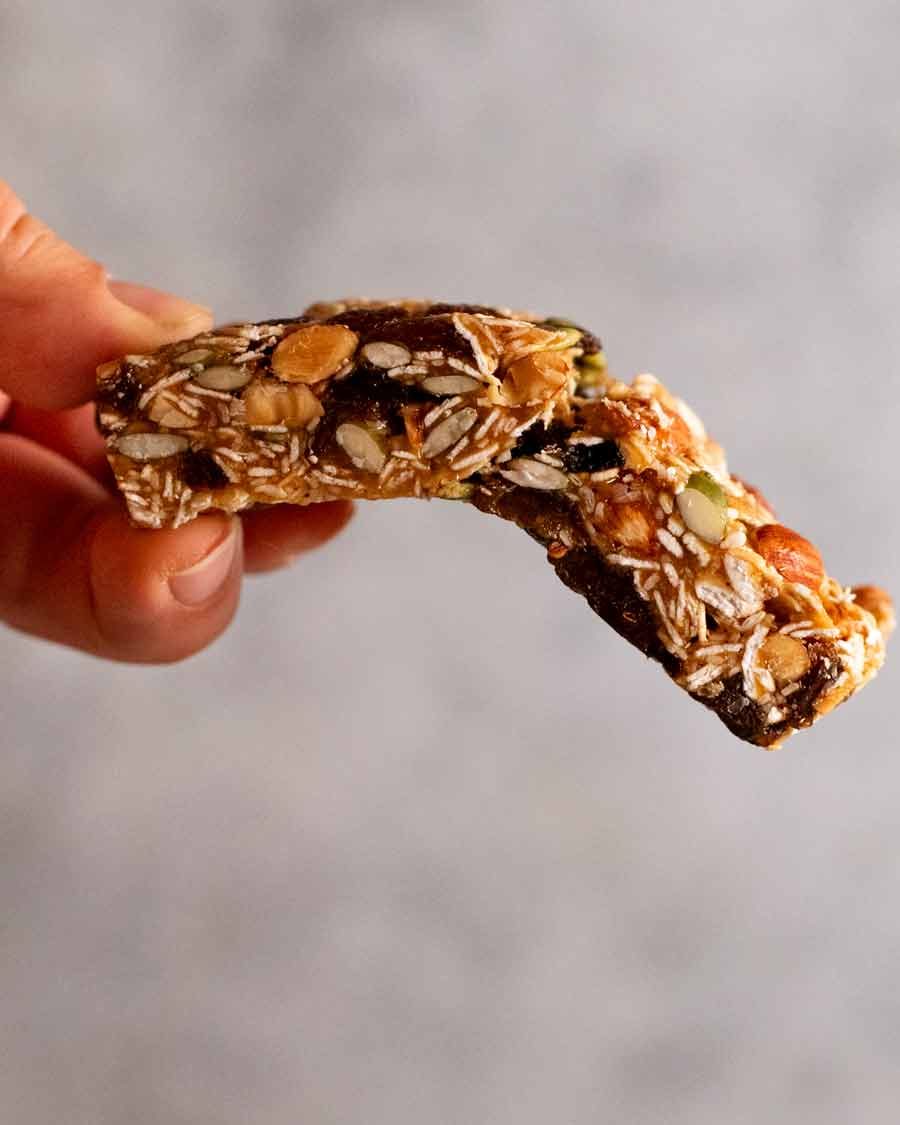
Doubt me? Here’s proof of chew:
What goes in muesli bars
The combination of fruit and nuts I’ve used is a copy-cat of Carmen’s classic fruit & nut muesli bars, a very popular brand here in Australia. You can really use any add-ins you want, as long as you stick to 3 1/2 cups in total as that’s how much the peanut butter-honey “glue” will hold together.
The glue
Natural peanut butter (or almond butter) – Different to commercial peanut butter spread because it’s got no sugar, salt, preservatives etc added. It’s 100% peanuts which means better peanut flavour and it’s runnier (hence why it works better for things like satay sauce).
Mix well if separated – The absence of stabilisers also means that the oil and peanuts will separate if left in the pantry for ages. Be sure to mix well to combine before using. If your peanut butter has solidified into cement, try microwaving briefly to warm (remove the metal lid!) then mix with a butter knife or chopstick. If that still does not work, scrape the oil & peanut cement into a jug and blitz with a stick blender (done that plenty of times!).
Non-peanut substitute: I think almond butter is best, for flavour and texture. I’ve read in other granola bar recipes that other nut butters work too.
Honey – For natural sweetness. Maple syrup should also work.
Add-ins
Rolled oats – not quick oats, just plain traditional oats.
Almonds – whole, roasted, unsalted. I like to give them a very rough chop so it disperses better.
Sultanas – or raisins, cranberries or any other dried fruit of choice (if using big pieces like apricots, suggest chopping).
Pepitas – because it’s in Carmen’s. Like that it adds some colour to all the brown-ness!
Sesame seeds – because it’s in Carmen’s.
Coconut – because it’s in Carmen’s. Use desiccated coconut (ie finely shredded) that is not sweetened. Flakes will also work but because they are larger they won’t disperse as well throughout (maybe chop or crush in hands?).
Cinnamon – a little touch of cinnamon really works in this!
Salt – Just a touch brings out the flavours in this.
How to make ultra-chewy muesli bars
I love that this is a no-bake recipe!
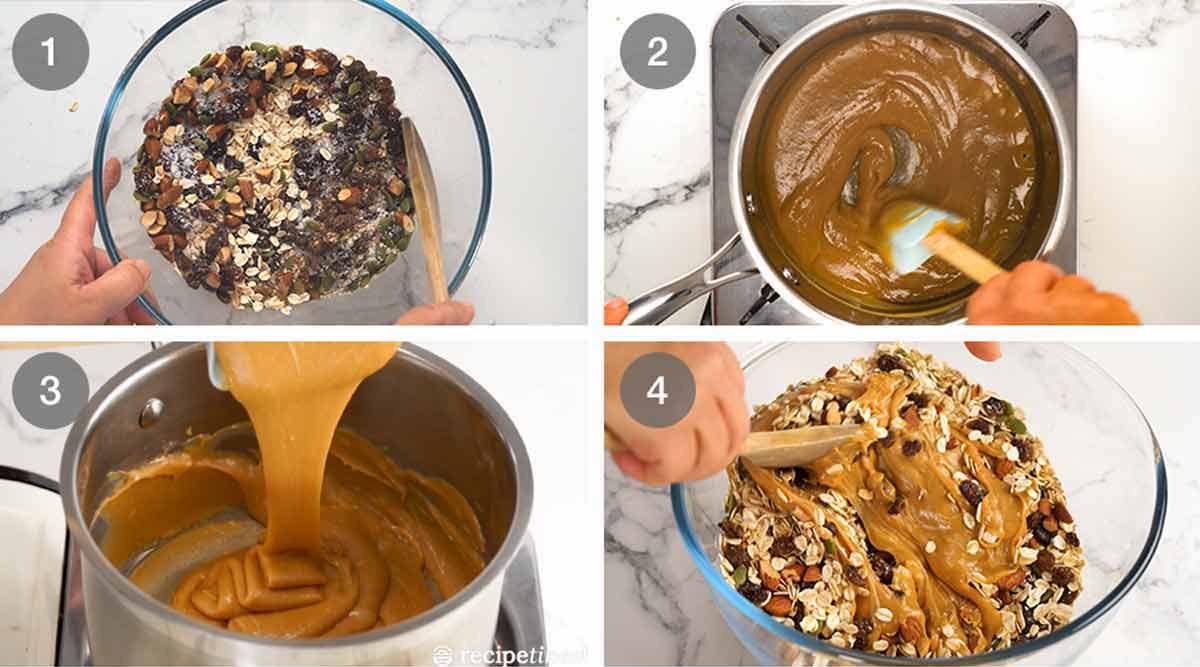
Mix the add-ins in a microwavable bowl using a wooden spoon.
Why microwavable? Because the peanut butter glue is quite thick and if the air is cool or if you take your time with the mixing or if you take a call from your friend mid-mix, the glue may get so thick it’s too hard to mix. If this happens, a 20 second microwave will do the trick!
Mix glue – Put the peanut butter and honey in a saucepan over low heat and mix to combine. Use a rubber spatula and cook, stirring almost constantly, for 5 minutes to thicken. Scrape the base of the saucepan, getting in around the edges. DO NOT WALK AWAY during this step as it can catch easily on the base.
Goal – Thick caramel-like mixture. It should mound like ribbons, as pictured above. Basically, the thicker the mixture, the chewier your muesli bars!
Immediately pour the mixture all across the surface of the oats. Use the wooden spoon to mix to combine until you can no longer see dry oats. At first this will seem impossible, but persevere as it will happen! Using stabbing motions and smearing against the side of the bowl helps.
If it gets too hard to stir, microwave for 20 seconds then it will be a breeze.
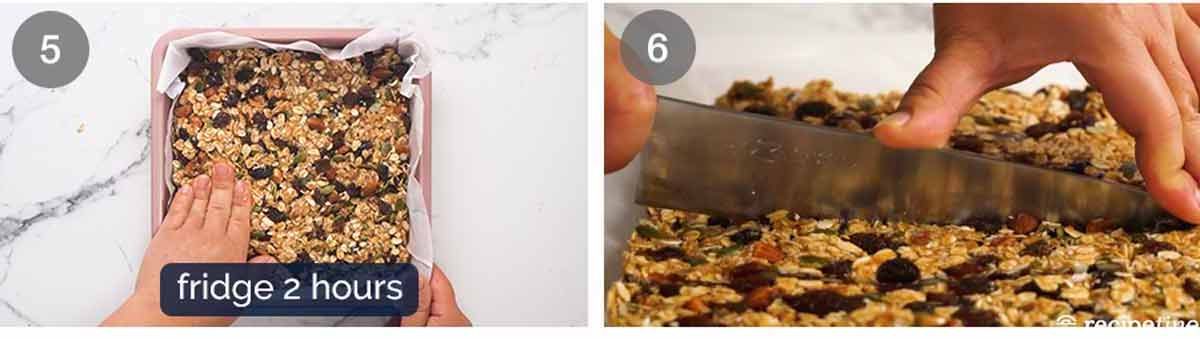
Press – Place a sheet of paper over a 20cm/8″ square pan (no need to grease, why create unnecessary washing up??). Scrape the mixture in then press it into the pan using a combination of the wooden spatula to spread it out, then hands to press it in.
Press firmly but keep some of the surface bumpy rather than aiming for completely flat. If you press really, really firmly ie make the surface almost completely smooth and flat, the bars will be very, very chewy. I personally found it a little too chewy, but maybe that’s what you want!
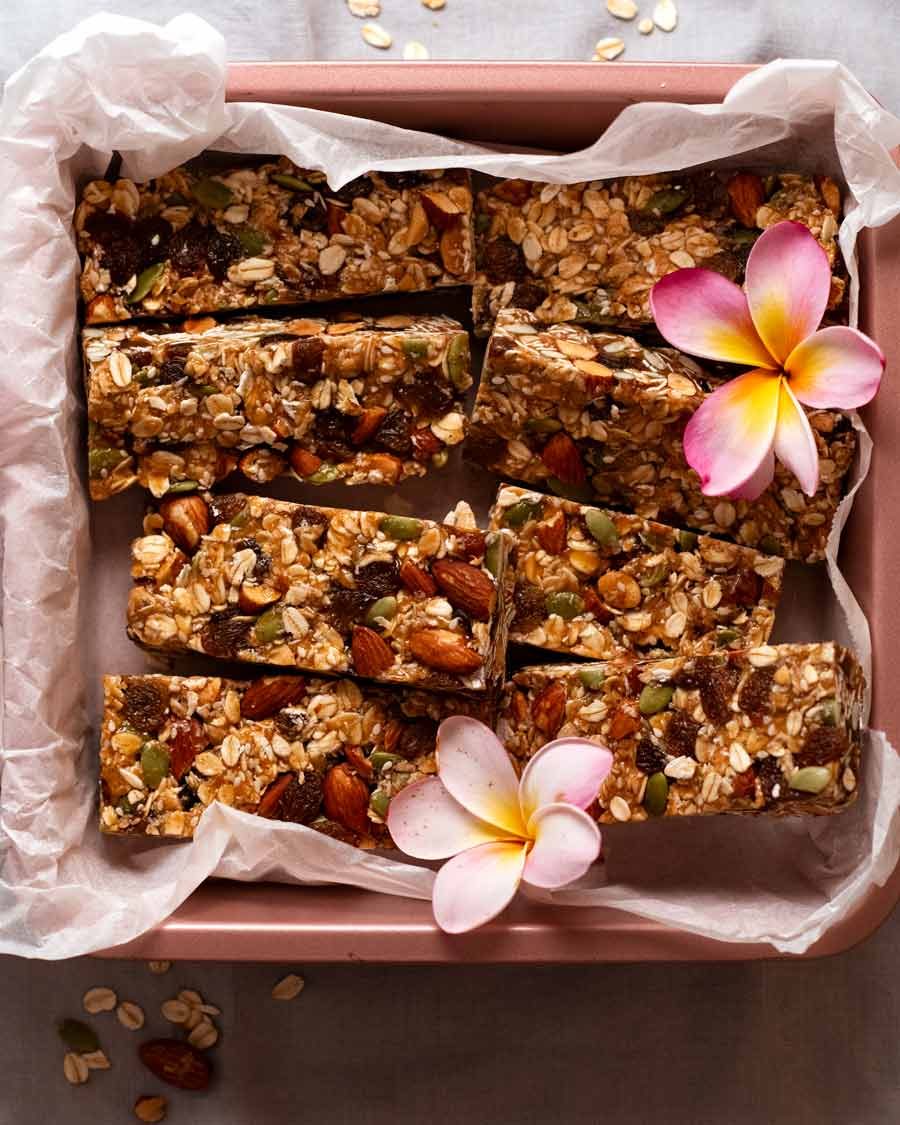
Refrigerate for 2 hours to set then cut into 10 bars. Or 8, if you want bars a little larger than store-bought. Then eat! Well, chew. 😂
Matters of muesli bars
Never thought I’d be writing a section titled as above, but I do have some a few practical matters to share with you on the matter of homemade muesli bars!
Are muesli bars healthy? This homemade one is, being made with all-natural ingredients with no fat or sugar added. However, most store-bought ones are not. Look closely at the ingredients list and you’ll see sugar and unfamiliar food additives listed.
Storage – Airtight container in the fridge keeps them fresh and perky for 2 weeks. Out of the fridge, the oats soften faster over time which alters the texture of the muesli bars. But they don’t go off.
Cold vs room temp – The muesli bars are firmer / chewier when fridge cold then soften to store-bought muesli bar level chewiness at room temperature. I actually really like them cold, for extra chew. As I mentioned earlier, it’s like a guilt-free chewy caramel!
When to eat it – Breakfast on the run or snack! Honestly, you’d never even think of these as “healthy” because they’re sweet and tasty. I cut them into squares, drizzle with chocolate (see last point) and serve as an afternoon tea sweet treat.
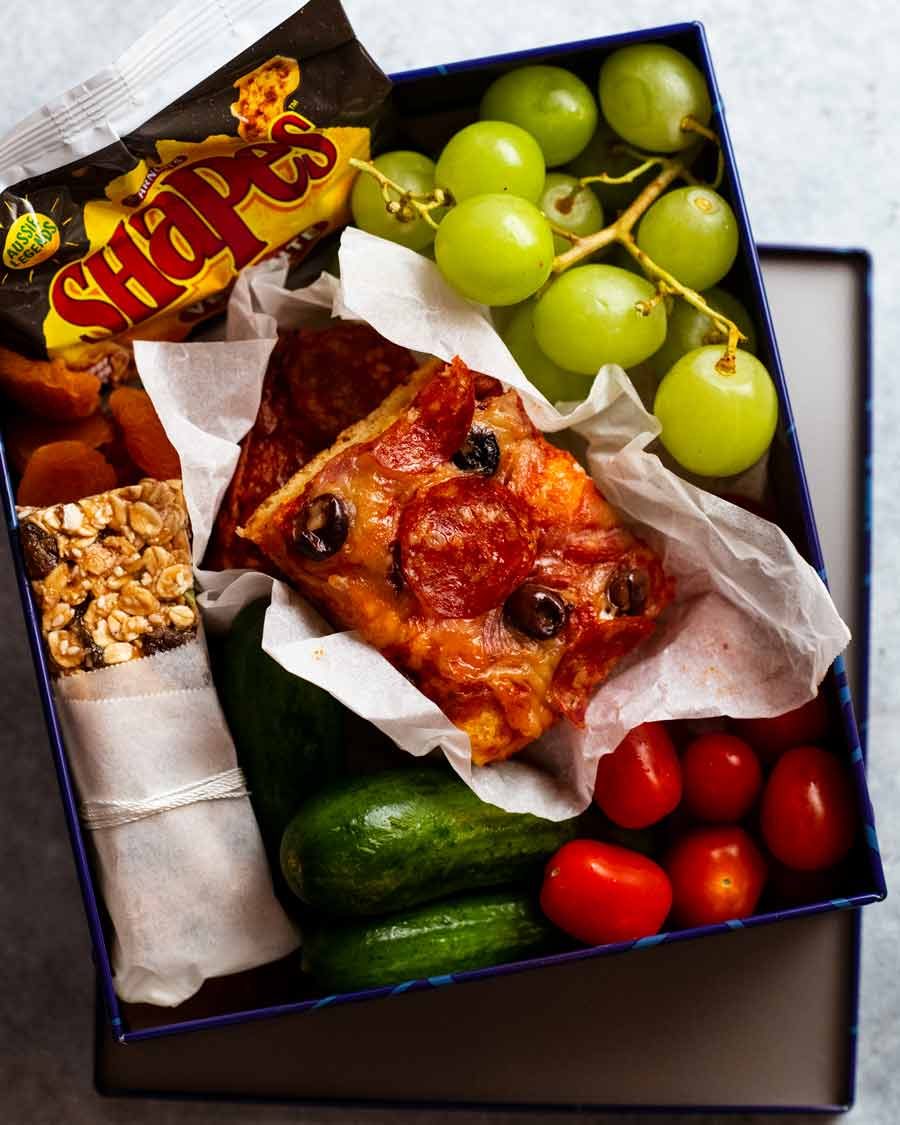
Lunchbox shelf life – Easily all day, out of fridge is fine. Fridge storage isn’t about keeping them food-safe, it’s about keeping them fresher for longer.
Mini choc chips – The choc chips on store bought muesli bars are smaller than the ones used in chocolate chip cookies, they are mini ones. I found them at my local Scoop Wholefoods (Mona Vale, Sydney). You know those stores where you help yourself to fruit, nuts, chocolates etc out of tubs?
To add them to your muesli bars, press the mixture into the pan then let it cool slightly else the choc chips will melt. Then scatter the mini choc-chips across the surface and use your hands to press them in. Then refrigerate.
Chocolate drizzle – You will only need a small quantity of chocolate drizzle. I find it hard to melt small quantities of chocolate in a bowl in the microwave (always seizes). I find the easiest way is to pop about 1/4 cup of chocolate chips (normal ones, this time!) in a small ziplock bag. Seal, microwave for 10 seconds at a time (massage to “mix) until melted. Snip corner, drizzle across muesli bars.
So, what do you think? Is this a good weekend to rummage through your pantry to round up all those leftovers nuts and dried fruit from other recipes to make homemade muesli bars?? – Nagi x
Watch how to make it
Hungry for more? Subscribe to my newsletter and follow along on Facebook, Pinterest and Instagram for all of the latest updates.
Chewy muesli bars (granola bars)
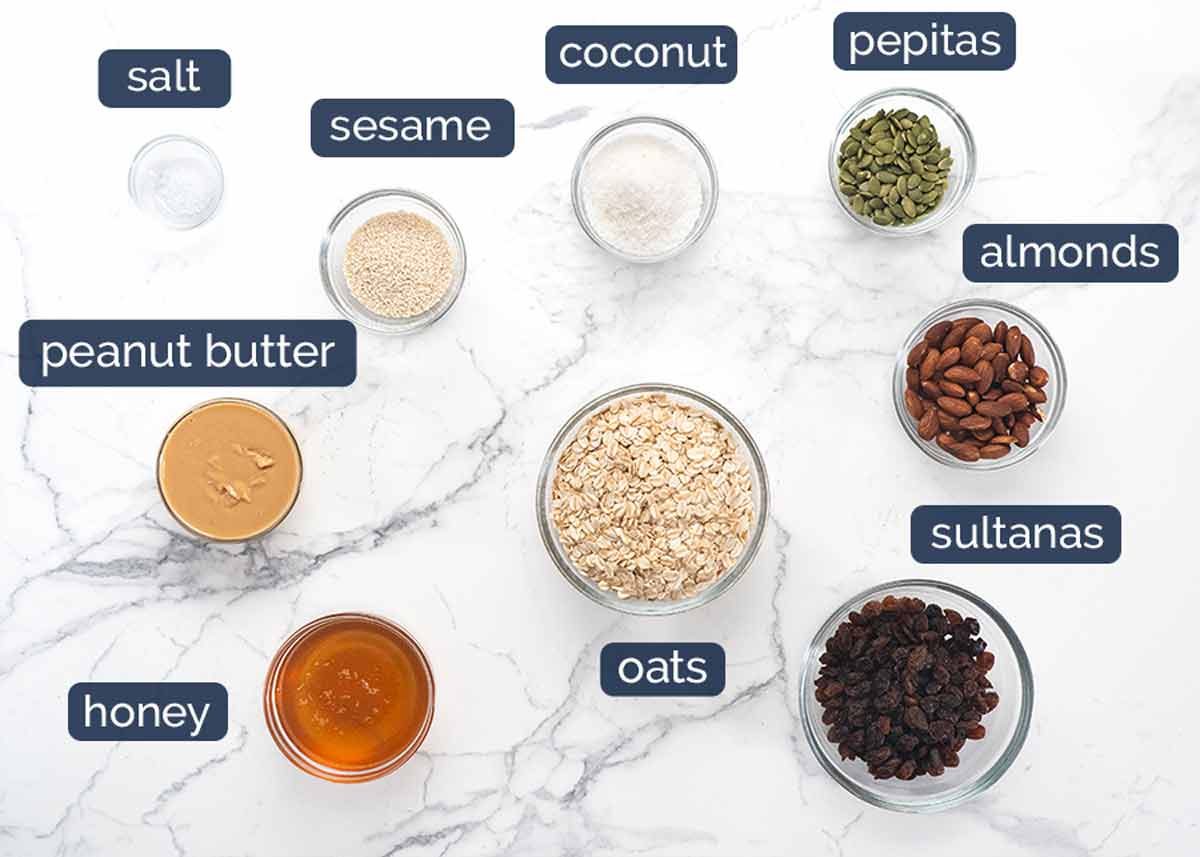
Ingredients
- 1/2 cup (120g) pure natural peanut butter, smooth, or other nut butter (mix oil in well, Note 1)
- 1/2 cup (175 g) honey (Note 2)
Add ins (3 1/2 cups your choice, Note 3):
- 1 1/2 cups rolled oats
- 1 cup sultanas
- 1/4 cup desiccated coconut , unsweetened
- 1/2 cup almonds , very roughly chopped
- 1/4 cup pepitas
- 2 tbsp white sesame seeds
- 1/8 tsp salt
- 1/2 tsp cinnamon
Instructions
- Mix Add-ins – Using a wooden spoon, mix the add-ins in a large microwaveable bowl (just in case, Note 4).
- Glue – Using a rubber spatula, mix the peanut butter and honey in a saucepan over medium heat until smooth. Once combined, turn the stove down to low. As soon as you start seeing little bubbles around the edges, cook for 5 minutes, stirring constantly scraping the base, until it is like a very thick caramel (see photos and video in post). You should be able to draw a path across the base and it holds before closing in on itself. DO NOT WALK AWAY, it will catch easily. (Note 5)
- Mix – Immediately pour it all over surface of the oats etc then mix with the wooden spoon. It takes a bit of effort but it does come together eventually. Stabbing and smearing against the wall of the bowl helps. If it gets too thick, microwave for 20 seconds on high to loosen the glue then mix (then it's a breeze!).
- Press – Put a square piece of paper over a 20cm/8" square tin (no need to grease). Drop muesli mix in then spread right into the corners, using a combination of your hands and the wooden spoon. Firmer press = chewier muesli bars.
- Set – Refrigerate 2 hours until firm then cut into 10 bars (cut in half, then each half into 5).
Recipe Notes:
Nutrition Information:
Life of Dozer
You knew I’d do this with the flowers as soon as I was done with the food photos, right??!

I make these often. They taste great, they’re easy and a fab way to use up odds and ends.
I love this recipe, but my arthritic hand and two trigger fingers did protest after the effort required for mixing. Today I tried the dough hook. The ingredients combined easily and my hands are happy. I also threw a bit of hand therapy into the mix (😉) and rolled the mixture into balls instead of pressing into a slice.
Nice one!
I love this recipe and make them at least once a fortnight. With the batch I just finished I had to use 20ish g of golden syrup as I ran out of honey and didn’t have any maple syrup. Glue consistency was great and not too sweet. Thanks Nagi!
My daughter just confessed to leaving 3 of these in her locker. Apparently eventually ate one due to sheer starvation. Now I’m providing recess for her group. Lunchbox winner!
Thank you for this recipe – it is fabulous! Works every time, despite my random approach to measuring. And great tip re cooking the ‘glue’ for longer. My current favourite combination of ingredients is to use almond butter instead of peanut butter, and add in macadamias and cranberries. And drizzled with dark chocolate.
So so good, I make them all the time mixing up the ingredients but sticking to the measurements for wet and dry….works EVERY TIME 🙌🏼
My new favourite recipe! I have made them a couple of times now. Favourite combo is cashew and apricot, with choc chips pressed into the top, I liked someone’s suggestion of pressing them in while it’s still warm so they melt in a wee bit. I don’t think I’ll every be satisfied with a store bought muesli bar again. As long as I have the time I think these will be in regular rotation. I don’t have a microwave so was a bit worried I’d be stuck with a big lump, but a quick mix is manageable as long as you don’t get interrupted.
Hi Anna
I tip the dry ingredients into the pan when the “glue” is ready, and stir it all in with the heat turned off. Its so much easier!!
Hi, I would like to try your recipe, can I substitute the peanut butter with dates ?
Please let me know.
Thanks.
Another great recipe. I’ve made this so many times with different combinations of fruit and nuts.
Easy and delicious!! I used cranberry raisin and toasted the sesame seed. They are so yummy! Looking forward to take them for a hike tomorrow.
Thanks for sharing this awesome recipe! Everyone loves it. I think I’ve made it a dozen times so far! Subbed some raisins with candied ginger and apricots. And toasted the coconut. Was delicious in all combos!
This is the best homemade museli bar recipe. I haven’t bought museli bars since making these. Thank you for sharing!
Made these this morning and they are fantastic.
I did add some dark chocolate to the tops because I found half a block left over from something else.
They are a huge hit. I went to do the grocery shop and no muesli bars on my list just some extra nuts and dried fruits to make some more!
Thank you Nagi for such an easy but delicious recipe😊
These are soooo good. Everyone that tried them asked for the recipe. Only problem is that they are so yummy we can’t stop eating them. Once again your recipe comes through. 5/5.
Hi Nagi, I love these muesli bars, they’re perfect to make when we’re away in our caravan as no baking is required. Currently I’m in the Red Centre of Aus, some call it the Heart of Australia and have been doing a lot of hiking and they’re a great healthy snack to pack in your back pack. Nagi I’ve been cooking your recipes for around 3yrs now and haven’t had one I wouldn’t cook again, they all have been delicious. We just had Zuppa Toscana from your cookbook tonight for the 2nd time on our trip which we really love. Your cookbook is amazing just like you. I now have my whole family enjoying your lovely meals from Dinner which they received for Christmas. Congratulations on the awards and accolades you’ve received, you deserve everyone of them and more. Love to you and Mr ‘D’🐶
These are unbelievably good. So easy and just use whatever dried fruits, nuts or seeds you have in the cupboard! Really delicious – thank you Nagi for the recipe.
Oh my gosh I’ve made them and 2 hours is so long to wait to taste them! Just tasting off the side of the bowl was divine!
I love your recipes, your book and I now have my adult daughter using your brilliant recipes and I recommend you to everyone. You’re so appreciated.
I used almond butter but I needed a lot less dry ingredients to mix it. I would say halve the dry ingredients if using almond butter.
So grateful to have found a bar that really works!! Thank you! Ticks all the boxes: home-made, full of goodies, delicious lunch box treats for the kids and the adults, and no more soft plastic wrappers 🙂 Yay!!
Why the wooden spoon?….oh yes. I get it. Yummo recipe!